So after installing the new PEX pipes in the wall, and insulating everything, I put up drywall.

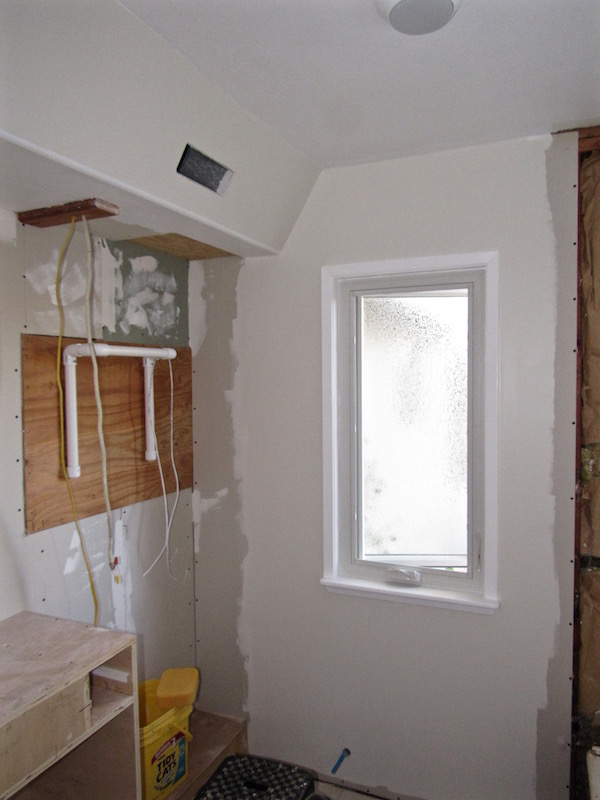
You can see the beginnings of the soffit in the upper left of the photo. I could not do more of that until the drywall was up; neither could I install the cabinet base (lower left) until the drywall was in. The soffit would house the heating duct, and because of its structural duties, would be built of plywood. In the photo below, I've installed the old ductwork (you can see the flexible duct going up into the attic). As it turned out, the old metal duct was sized 3.5" x 10", and had been inserted into the top of the wall separating two parts of the old bathroom, with registers exiting both sides of the wall. I didn't think to change to a larger size duct, and that came back to bite me when I discovered there were no 3.5" registers for sale. More on that later.
In the upper right of the photo is the patched hole for the old square light fixture. That will be covered with joint compound, sanded and painted.

With the ductwork securely in place, I fastened plywood to the bottom of the soffit, including a piece of 2 x 4 that would anchor the future partition wall between the vanity and the shelf cabinet. The partition will house the light switches and the electrical receptacle (can't put them on the left side of the vanity because the pocket door fill that wall).

In this followup picture, the window on the right has been trimmed out, and drywall screwed to the plywood soffit. Joint compound has also gone on. The lower edge of the soffit has plastic bullnose corner bead applied; it's designed for right-angle corners, but is flexible enough for larger angles as well — in this case, 120˚. You may notice that my improvised PVC pipe towel rack is still on the wall.

Apply some paint:
By now, I've leveled the cabinet base and screwed it into the wall, and then screwed the vanity cabinet into the base and wall. I then built the open shelf unit carcass (still needs interior paint and cherry trim, as does the vanity cabinet). For now, it's just sitting in place.
Since there was no register that would fit inside the duct, I bought a 6" x 10" return vent grille (smallest size available) and screwed that over the duct. That looks bad, so I will custom build a cherry grille for the duct.

That's where the guest bathroom stands. I need to mill some cherry for the trim on the cabinets, and my planer blades are dull. I have new blades, but can't find the special steel tool to set the blades accurately, so I'll have to build a wooden jig (eventually). I also need the Corian countertop (with integral sink and backsplash), and a larger version of the same for the master bathroom. So progress stops.
Meanwhile, I've been putting up tile in the master bathroom shower. This is where that stands:

The blue tape on the floor is to keep the white grout off the floor tile (and its light gray grout). I need to press the white grout under the cove base wall tile. Close up:

At this point, I can't really do more on the bathrooms (other than shower wall tile) until I get the marble thresholds (that go on the floor under the doors) and the vanity countertops. All of that, as well as the big kitchen countertop, will have to come from the same contractor. I'm hoping I'll be able to find a competent and honest company, not a trivial matter, but that's the next task ahead. Starting tomorrow.