Every place I've ever lived has been designed for that "average American family," with lots of bedrooms, living room, dining room, family room, etc. The problem was that I was a single person, not an average family. I needed space, but for hobbies, not people. And because I'm over 6'2", bending over to use sinks designed for children was a constant frustration. Over the years, I collected a list of things I would change if I could have my dream house. As I approached retirement, I realized time was running out for that house; it was now or never.


Dreams are not always perfect, however. I could never afford my dream house, a spacious Southern California home overlooking the Pacific Ocean. But I could afford a modest ranch house, with a 20-mile drive to the beach. It was a very long way from perfect, but it had potential.


This blog documents the process of turning that small average house into something that matches my lifestyle. It will be as close to my dream house as I can make it. I'm doing all the work myself to stretch my resources. By not hiring contractors, I can afford high quality materials, and I'll know the job is always done right. The remodeling will be my primary avocation for a few years, even as I try to fit in my writing and other hobbies.


It promises to be an interesting journey, and a challenging one!

Friday, December 28, 2018

Credenza — Part 2

I think as the house becomes more "normal," it seems the urgency to complete new projects diminishes.  Or perhaps it's just that my time is spread out over more activities.  But progress continues.

As my last post concluded, I was working on the drawers for the credenza, as well as the solid cherry top.  Because the credenza is a bi-level design, there are actually two tops.  Each is made up of three separate pieces of cherry to achieve the full width.  The edges of the boards were run through my jointer to make them straight and true, so the glued seams would be without gaps.


Here's a close-up of the biscuit joints that ensure the pieces will remain aligned when they are clamped together.


Here's what the upper top looks like finished.  I don't like to use stain because although it would make different pieces of hardwood match, it also hides a lot of the detail in the grain.  Wood is not a homogeneous material; each piece is different.  In this case, there is a lot of variability in cherry.  It doesn't always "match," but I like that.


Here's one of the finished drawers open.  Because it's a taller drawer, I used cabinet-grade birch plywood, with a solid cherry front.


Plywood drawers are more difficult to build than solid wood dovetail drawers.  They have tongue and groove joints, and need special moldings to cover the edges, which I have to custom make.


The low side of the finished credenza faces the desk, and has two wide drawers.  In this photo, the shallower top drawer will be made from solid wood (dovetail joints) when I set up to make the next batch of dovetail drawers.  For now, the drawer front is just sitting there propped up by itself for the photo.


The drawers in the upper section of the credenza face away from the desk, toward the kitchen.


The Drawer Factory

I've now made 56 drawers, with maybe another hundred to go (but who's counting).

Included in this latest batch of plywood drawers are two for the kitchen: a deep one for my cereal, and an even bigger one for either a bag of dog food, or my old KitchenAid mixer.  I buy my cereal from Trader Joe's, and since it's a long drive, I stock up on cereal and need a deep drawer to hold a good supply.  🙂


And the other big one (opposite side of kitchen):


Next

One of the reasons I was slow to finish the credenza was that I have been working on a couple of other projects concurrently.  The next post should present another piece of furniture — a living room "entertainment" console to sit below the wall-mounted flat-panel TV, to hold a blu-ray player, an A/V receiver, and a center channel speaker.  It will also have three dovetail drawers.  It's about half-way finished, so it should not be a long wait.

I previously planned to start on the garage extension as my next "major" project, but I've now resumed work on the guest bathroom instead.  That's likely to be a two-parter, post-wise.  Or three.  Or four.  Sigh.

Thursday, November 8, 2018

Credenza — Part 1

Here it is November and the last post was in September. 

Things must be dragging.  Cabinet-building and drawer-making are slow, at least this time.  This post isn't even a full accounting of my current project, but since I haven't posted in a long time, I decided to do a Part 1 (and later a Part 2).  Hopefully I won't need a Part 3.

The credenza I'm building is a bi-level affair to provide a place for my huge 8-ink 13" x 19" printer, as well as eight drawers for associated office stuff.  It sits at right angles at one end of my desk, and the drawers are on the front and the back.  The advantage of building custom furniture is that it can fit the space and the specific use. 

But the pictures will explain better. 

The credenza was constructed in three sections:  a high part, a low part, and a base.  The high and low sections are each 30" wide, so the credenza ends up 60" wide.  Notice the drawer slides were installed before the carcasses were assembled, while I still had good access.


The pieces go together like this:


You may remember that the small pottery studio table I built was painted a dark blue with mostly cherry trim.  I liked it so much that I decided to use the same combination for the credenza (plus I already had the paint). 

The credenza, when assembled, would be heavy and awkward, so I moved the three pieces separately into the house, and screwed them together in place.  Then painted the plywood sections, then added the cherry trim (and put a clear finish on that).  To wit, the low end (with printer sitting on top):


The wide drawers (scanner, graphics tablet, printer paper) are accessed from the desk side.  The six narrower drawers in the high section will be accessed from the other side:


In the above photo, three of the drawer boxes are just sitting in their cubbies (I have now installed the drawer boxes on their slides, so they pull out).  Missing, of course, are the cherry drawer fronts, and the solid cherry credenza tops (separate for upper and lower sections).  I need to make another run down to the hardwood store to buy more wood for the tops, and also for some 1/2" thick poplar and maple for dovetail drawer sides.  Hence one of the reasons for a Part 2. 

The Drawer Factory

So I've also been building about a dozen drawers, out of birch plywood.  These drawers are not shallow enough to use solid wood with dovetail joints; the wide thin boards tend to cup (if you can even find boards wide enough).  As I mentioned previously, the plywood drawers are also more tedious to build, because the edges need to be covered and reinforced with custom-made maple trim (and I need to buy more stock for that, as well).

But I'm getting there, slowly.  Early in the process:


I've now glued these together, complete with bottoms.  Quarter-inch thick bottoms for the smaller credenza drawers, half-inch thick for the larger drawers, and one kitchen drawer that will carry a lot of weight got a three-quarter inch thick plywood bottom. 

Part 2 of this credenza post will cover the finishing-off of these new drawers, with a diagram detailing joints.

Despite every effort to measure and cut out all the parts precisely, a couple of the drawers did not fit exactly within the two halves of the drawer slides.  My table saw is a "contractor's" saw, which means it's perfectly fine for the tolerances needed to build a house, but rather a challenge to get the precision needed for cabinet-making.  So a little rework is sometimes required.

One of the wide credenza drawers ended up being about a sixteenth of an inch too wide (1.5 mm) to fit between the drawer slides (which require very accurate tolerances).  So I will build a simple router jig to machine off a tiny bit of wood from the sides of the drawer under the slide. 

The sides of one of the narrow credenza drawer openings ended up not perfectly parallel, which will require another (hopefully) simple jig to take off a thin wedge from one side of the drawer opening.  Unfortunately, it's the smallest opening, perfect width at the front but too narrow at the back, so I will have to maneuver a small router in those tight quarters, and expect the router will block my view of the work.  Ugh.  Stay tuned to see how that turns out.  ☹️

Looking ahead

Drawer work is tedious.  It's nice to see (and use) the finished drawers, but they gobble up weeks with little progress to see from one day to the next.  Nicer projects in the wings.  The second bathroom is beckoning (a small room with a visually gratifying payoff).  Even more gratifying will be the garage extension.  The concrete work was done a year ago (or even longer).  The porch roof was the trial balloon for technique.  And that's done.

I had planned to wait until spring, when the rain will be done for another six months (or so), but it's rained just once this "rain year" (fall through spring), with none on the horizon, so I'm anxious to start.  The current plan is to break down the big garage project into smaller parts, and do these when the weather allows. 

But if not doing the whole job at once, planning demands that the smaller parts of the whole each be able to stand alone.  When one part is done, the garage should be weather proof, and still able to be used as a garage.  So obviously I can't just start by opening up the roof.  Everything below that would have to be ready for the new roof section to quickly go on. 

Some of my early projects were broken down into more than ten parts, so that's what I see happening over the winter.  New garage roof on in the spring.

Here's a photo of the end of existing beam/garage door header, exposed to get an idea of the challenge.  Big.  Long.  Heavy.  Needs to be moved up (about 16"), so bottom is flush with the ceiling.  It holds up the roof, so I'll need to build a temporary wall just inside it. 


More fun than drawers. 

Wednesday, September 26, 2018

New Shingles — Part 2

So, last time I ended the post in the middle of applying shingles to the intersection of the main roof with another section that veered downward, and not knowing how to describe that very well, suggested that I would begin the next post with photos that would illustrate.  To wit:


So there is a ridge formed where the secondary section of roof slopes down, and there is an overhanging eve with a slot between it and the lower roof.  The "specialness" is that there is a ridge and a flat roof in the same place, and therefore the need to accommodate both. 

Viewed from below, you can see that the shingles continue up under the eve, but they have to continue over the top of the virtual ridge to prevent water from getting in from the side.  


So the shingles fold over the ridge, and then the other shingles on the main roof have to just cover all of that, as if there was no ridge. 


The ridge nevertheless still needs its special shingles that cap the top.  So another layer.  Where the ridge is open, it gets the special, thick, multi-layer cap shingles.  These are too thick to continue into the slot, so I just used regular shingles cut to size to cover the ridge inside the slot.  Hmmm.


And then continue to shingle the main roof as if the slot was not there.  Should work :-)


Moving right along . . .  I mentioned last time that the space over the cathedral ceiling did not have enough insulation, or rather, that the whole attic had too little and that I added a LOT except where there was no access.  This was on the south side of the house, under the section of roof that I was doing next.  I therefore pulled up a couple of sheets of plywood over that area to see what was there.  And as expected, there was only about 5" of insulation — way too little for an attic, especially under a south-facing roof in Southern California's hot sun. 


But at least I could now add more; there was access. 


The next step was to strip the roof of all the old shingles and roofing paper.  It was a mess.


But was not too difficult to remove.  Over the side of the roof I threw it, where it would sit until I could clean it up later.  After that was gone, I set about to remove two rows of plywood, one nail at a time.  Didn't take too long (compared to the geological history of the planet).  Then, just a matter of stuffing in 6" more insulation, giving a total of about 11".  I installed 1.5" of foil-faced styrofoam close to the eves where a full bat would not fit.  About all I could do, but it will be a big improvement.


Then nail the plywood back on.  Clean slate.


Because there were no complications for this part of the roof (for example, the porch gable roof on the north side), I trimmed the excess overhanging wood at the edge, applied roofing felt to the whole section, then drip edge, then the shingle starter course, and then began nailing shingles.  Almost organized.


Faster this time.  Less cutting (until I reached the ridge, but by then the end was in sight :-).


Such a feeling!  With rain forecast in just a few days (well, 50% chance of showers — first rainfall in six months).  This south roof is big and empty, and should provide ample room for more than enough solar panels to go off the grid, but that's for the future.

Also for the future, is the garage extension.  Next spring.  And because of that, the garage roof will have to wait until then.  Here is the comparison.  New versus old.


Nice!  (and it only took how long?)


Up next?  1. Clean up the roofing mess.  2. Likely, build the new printer credenza for my desk, and maybe the stand/cabinet for the living room TV center channel speaker, receiver, and blu-ray player.  3. Definitely more drawers!  4. And begin planning for the garage extension, expected to be another long-running project.

No end in sight.

Friday, September 7, 2018

New Shingles — Part 1

My house is not all that big, but it's a single-story house, so it has a lot of roof area — pretty much the same roof area as a two-story house with twice the square footage.  But I've put new roofs on four or five houses over the course of a lifetime, and it's not a very difficult task.  But a lot of work!

The good thing about putting on a new roof in southern California is that there is generally no rain from April to October, so no worries about leaving the stripped roof uncovered (although I have a big blue tarp from my last roofing job).  The bad thing is the very intense, hot summer southern California sun, so I have elected to limit mid-day work. 

And it's just me doing all the work.  The result is that stripping the old shingles and applying the new is taking a long, long time.  So this is Part 1, just because I'm feeling the passage of time. 

So on with the show!

First, strip the old shingles.  Many people leave the old ones on and just nail the new shingles on over the old.  To me, a very bad thing — bad to the bone!  I have a special shingle-stripping shovel that can get under the nails and lever off the old shingles, and I started using that.  But the old shingles on my house were stapled on (another cheap trick), and I found that I could just pull off big hunks of shingles with my hands (wearing gloves).  That proved to be the most expedient. 


I'm not going to explain in detail how to put new shingles on, as there are lots of youtube tutorials by shingle manufacturers and contractors that would do a better job.  This is just a tale of my roof, and some of the challenges I found. 


With the roof stripped, I needed to patch a few holes (that I had not already taken care of).  These were holes for gas appliance chimneys that I had removed, and I also relocated a wind turbine ventilator to a new position (plug the old hole and cut a new one).  The basic process is to screw a piece of wood around and across the hole to the underside of the roof plywood, and then screw a plywood patch (the size of the hole) to the new wood structure.

In this photo, the plywood patch is on the left of the hole, and the structural wood piece is on the right, ready to slip in on the underside and fasten with screws from the top of the plywood.  


Looks like this when done.


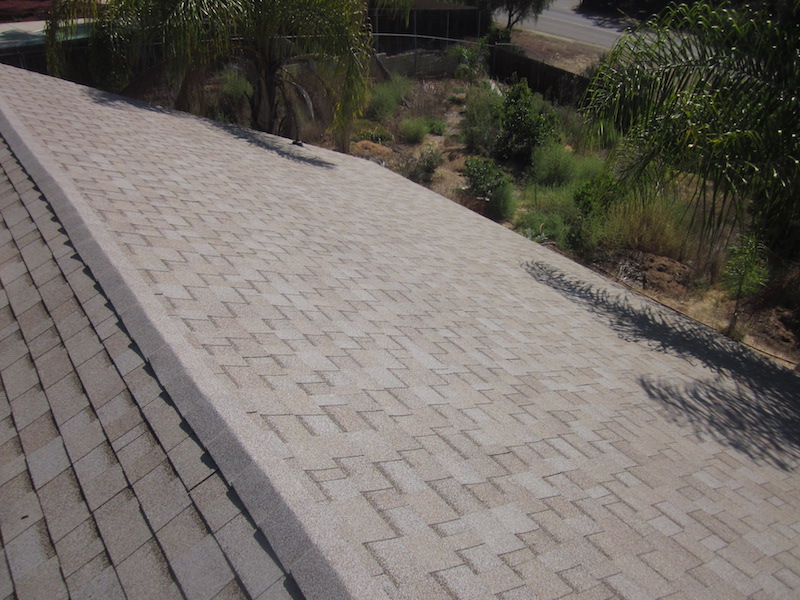
With the roof stripped and patched, I covered it with roofing felt, then applied metal drip edge along the eves (bottom edge) and rake (side edges of gable roof).  This is the top of the drip edge.  In the past I used 3" wide brown drip edge, but only white was available, so I use bare (galvanized) metal this time, 2" wide — the building customs out here on the west coast are not what they are on the east coast. 


This is what the drip edge looks like from the side (there was no drip edge at all on the roof of my house as originally built — just the shingles hanging off the edge, unsupported — scandalous!).  I will paint it to match the fascia.


In the past I've always used the cheap 3-tab shingles, but I found that when purchased with the volume discount, the thicker architectural shingles cost just a little more.  With 3-tab shingles, you cut off the bottom half and use the top part for the "starter course," needed to ensure the water does not leak through the first course.  With the thicker shingles, that have no slits, I elected to use a specialized starter course, which is a shingle-type material that comes in a roll.  The bottom is covered with plastic, which is pulled off during installation, exposing an adhesive coating that sticks the starter course to the underlayment.  In addition, there is a strip of adhesive along the front that sticks the starter course to the underside of the first course of shingles.  Here's what it looks like installed over the (also black) roofing felt.


At this point, you start nailing on shingles (and I was absolutely going to use nails, and certainly not staples).  In the past, I used a hammer, pounding in the nails one at a time, as well as my fingers.  Because I was saving thousands of dollars doing the new roof myself, it was easy to justify buying a pneumatic coil roofing nailer — an absolute joy!


With that, let the shingling begin!


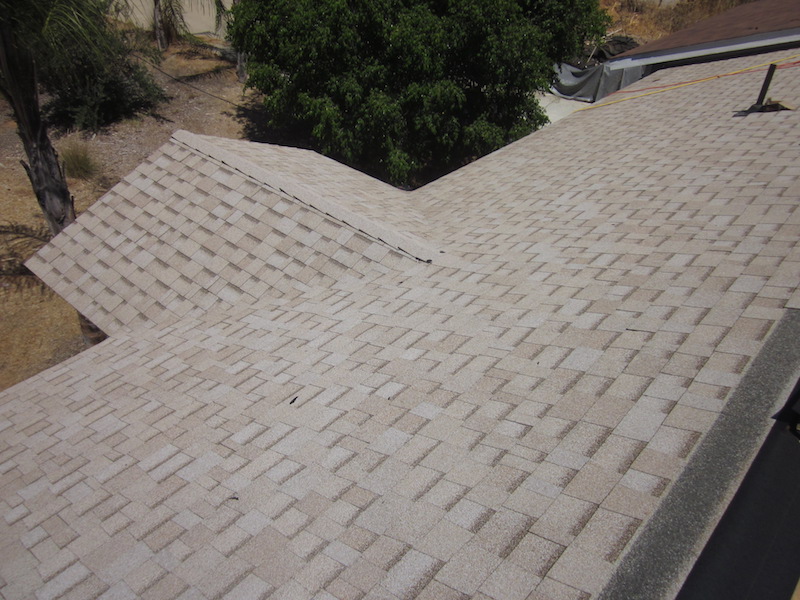
Adding the porch roof introduced a complication to the shingling — to wit, valleys, where different slopes of the roof intersect.  There are perhaps three methods of dealing with these valleys.  I elected to interweave them, which is described as the most foolproof (read waterproof) of the methods.  Some people say it's good for the thinner 3-tab shingles, but not appropriate for thicker architectural shingles because it can look bulky where the shingles overlap.  The manufacturer of my shingles recommended another method, but said the interwoven method was also acceptable. 

Now that the singles are on, I did not notice any bulkiness in the valleys. 


I also used special matching ridge shingles from the same manufacturer, made of several layers of shingle material, so they sit thick and proud.  (With 3-tab, I just cut the three tabs apart, and use each of the tabs as one ridge shingle.)


I expected difficulty at the intersection of the porch roof ridge with the main roof, that is, the shingles not bending flat over the odd shape.  I was planning to make a fiberglass shingle with glass cloth and epoxy resin, molded in place, but the special ridge shingles worked okay, with screws used (with wide plastic tops), to hold it down (and black roofing adhesive to seal the holes). 


After that, having only to deal with a big flat roof, progress would come faster. 


Like this.


As it turned out, I couldn't run right up to the ridge, due to an element where the back roof over the pottery studio intersected the main roof.  There was a wide slot of sorts in the eve. 


The shingles on the back roof have to first come up to the intermediate ridge, and ridge shingles applied in the slot under the eve on the upper roof.  Then the main roof shingles cover that ridge.  When I get to that point, I'll take photos to make it clearer.  I plan to use thin 3-tab shingles for this short portion of hidden ridge; they won't be visible. 

All of this means I have to reshingle this smaller back section of roof before I can continue upward on the front main roof.  So back to stripping off shingles.


And applying roofing felt, drip edge, starter course, and shingles, as well as step flashing where the roof intersects the wall. 


There is a big bit of flashing where the roof connected to the chimney, to route rain water around the chimney, but as you may recall, I removed the chimney.  So technically, this bit of flashing kit isn't needed, but as it's solidly attached to the wall, I'm going to leave it in place.  Won't hurt. 


As I'm writing this, I've actually applied several courses of shingles up from the bottom of this section of roof, but that will be included in Part 2.  Not so much work, this small section of roof.  Can't say that about what's over the hill . . .  (the right of the photo, over the ridge)


It's another big section of roof, but has the benefit of being a simple big rectangle.  The (unusual) complication is that the south side of the house has cathedral ceilings inside, with the space between the roof and the ceiling tapering from the center of the house to the side.   I was able to add more insulation to the upper part of the roof (from the inside, the attic), but was not able to insert needed insulation into the outside half of the space. 

It desperately needs more insulation.  My solution is to remove the roof sheathing after the shingles are gone, and put more insulation in place from above.  This could be a huge challenge, or it could be reasonable.  Nothing's simple.  :-(

Friday, August 17, 2018

Porch Roof — Part 2

Home Depot quickly restocked the shingles I wanted, so I had those delivered along with the plywood I needed to finish the porch roof.  The first piece to go up was a piece of T1-11 plywood for the biggest part of the ceiling.  I used my pneumatic nailer and 2-3/8" hot dipped galvanized ring shank nails to attach the plywood.  The nails are also coated with an adhesive that is activated by the heat from driving the nail in, so this ceiling is not going to fall down.  


To get the plywood for the roof deck up on the roof, since I work by myself, I leaned my extension ladder against the edge of the roof and pushed the 0.6" plywood up.  It worked well; I will use the same technique to get the bundles of shingles up on the roof (except maybe I'll pull those up the ladder with a rope).


Here are the two sheets of new plywood I used, nailed in place; the rest was recycled from my old concrete forms. The final small triangles of plywood would soon be in place.


The fascia on the front of the porch looked too bare and wide, so I added pieces of my usual PVC baseboard to the top, upside down, to give it some interest.  The before:


And the after:


With the rest of the ceiling installed, I started adding the soffit.  More T1-11.


With the soffit finished, I just need to add some trim strips to hide some edge gaps, and some other decorative trim around the base and top of the posts.  But I'm going to do that later.  What I really wanted to see was what it would look like with some color.  The remaining house trim paint I had didn't go very far, but it did make the visualization easier. 


Here's a closer wide-angle view.  Almost done.


Now I need to start on the shingles.  Still hot here, so planning to take my time . . .