Every place I've ever lived has been designed for that "average American family," with lots of bedrooms, living room, dining room, family room, etc. The problem was that I was a single person, not an average family. I needed space, but for hobbies, not people. And because I'm over 6'2", bending over to use sinks designed for children was a constant frustration. Over the years, I collected a list of things I would change if I could have my dream house. As I approached retirement, I realized time was running out for that house; it was now or never.


Dreams are not always perfect, however. I could never afford my dream house, a spacious Southern California home overlooking the Pacific Ocean. But I could afford a modest ranch house, with a 20-mile drive to the beach. It was a very long way from perfect, but it had potential.


This blog documents the process of turning that small average house into something that matches my lifestyle. It will be as close to my dream house as I can make it. I'm doing all the work myself to stretch my resources. By not hiring contractors, I can afford high quality materials, and I'll know the job is always done right. The remodeling will be my primary avocation for a few years, even as I try to fit in my writing and other hobbies.


It promises to be an interesting journey, and a challenging one!

Saturday, September 24, 2016

Soft water, HOT water!

When last I left you, my new Rheem gas high-efficiency water heater had proven to be defective, and the old pressure reducing valve on the main water inlet pipe coming into the house was leaking internally (in other words, broken).  So the new water supply system was a mess.  I ordered a new pressure reduction valve (about $110), and after talking to the folks at Home Depot (who said they could only give me a partial refund for the defective water heater), I contacted Rheem using their web site's contact form, selecting their "Warranty Dept" as the recipient of the message.

After four days of not hearing anything from Rheem, I sent a followup, and after a week of waiting in vain for a response, returned to Home Depot, ready to take whatever they were willing to give me.  Well, they were nice and called Rheem to grease the skids, talking to several people, and I was on the phone with one of them.  He asked about the problem.  I described it and he said it could not be repaired, that they would send a replacement (as their written warranty had laid out).  I would just have to bring the defective water heater in to Home Depot.  Great!

He then talked to the Home Depot person and I thought I was all set.  Not.  Apparently Home Depot has a close relationship with Rheem, but Home Depot handles warranty claims their own way, and only their own way, and if I was going to bring the defective unit back to Home Depot, they would only be able to give me a refund, and then I could reorder a new one.  But the price for a new one was now $500 more than when I bought mine, and there was still the matter of a pro-rata refund for the water heater bought early-2015.

At this point I was ready to cut my losses, so I went home and uninstalled the defective water heater and brought it back to the store.  I had known this particular Home Depot person for a couple of years, and she got the store manager involved, and after they had some further discussions with others, they came back and gave me a full refund.  Thank you, and kudos to Home Depot!

But after the bad experience with Rheem, I was not going to buy another one, especially the same model for $500 more.  So I went home again and did more water heater research, and found that there were only three primary manufacturers of water heaters (sometimes sold under other names).  Rheem (sold by Home Depot), Whirlpool (sold by Lowe's), and another name that was sold through plumbers and contractors.  After looking at Whirlpool reviews, I decided I would bite my tongue and buy another Rheem, although this time a no-frills, much cheaper electric water heater — and a model that Home Depot had in stock.

But first I had to undo all the gas water heater infrastructure.  PVC pipes running up through the roof bringing in fresh air for the burners and exhausting combustion products, the condensate drain line, and that new steel gas line I had just installed.  Fill in the holes in the ceiling and paint, etc.  Then bring the new, smaller 40-gallon electric water heater home and put it in place.  The old earthquake strap would have covered the upper thermostat access door, so I had to put the water heater up on blocks and lower the strap to make it fit.

The water inlet and outlet pipes fit fine, so I filled up the tank, purging air from the hot water pipes until the water ran freely from the bathroom faucet.  No leaks!  There was still the matter of the electrical connection.  The water heater needed a 240-volt, 30-amp circuit, but I needed more space in the electrical sub-panel, so I ordered a combination circuit breaker made up of two 120-volt, 20-amp breakers (to replace two existing full-size units), and the one new 240-volt, 30-amp circuit breaker for the water heater.  The combination unit takes up just two full-size spaces (regular breakers would have used four spaces).  It's the unit lower center in this photo:


The 30-amp circuit took a 10-gauge cable (color coded orange), run the short distance over to the water heater and down from the ceiling through a blue flexible conduit.  Very simple.


The whole electric water heater installation was very simple, so why did I install the complex, expensive high-tech gas water heater in the first place?  1) The forced-air unit had a sealed combustion chamber, drawing air from outside, so no open flame inside the house that cheaper, less-efficient gas water heaters have.  The cheaper gas units also need a double-walled metal chimney running up through the roof, rather than a simple PVC pipe.  And 2) Efficiency.  The expensive gas water heater had an estimated $199 annual operating cost, while the electric unit's estimated operating cost is $550 per year.  That's for a family's use, of course, and there's just one of me, so those numbers would be much lower.  It's a trade-off.  And, if I end up installing solar panels on the roof, electricity will be free for life (well, after the initial large capital expense).  The same logic also applies to my decision to replace the aging gas furnace (plus electric A/C) with an electric heat pump, but that's a post for the future.

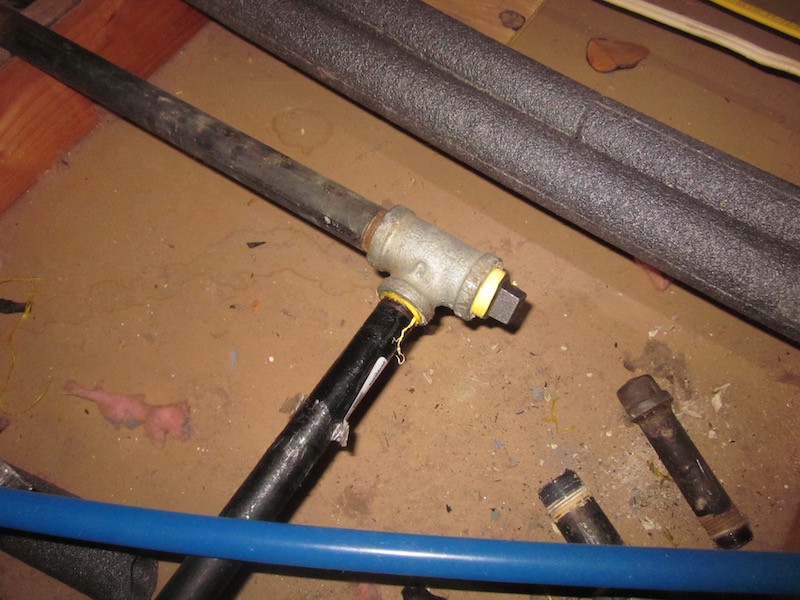
Before the new water heater installation was complete, my new water pressure reduction valve arrived, which I installed with no problems, resulting in a straight-through water path.  I adjusted the pressure to 50 psi (down from the municipal 100 psi water pressure).


Once I had tamed the very high pressure, I was able to bring the water softener on-line, slightly opening the by-pass valve to slowly fill the tank of resin beads.  Then program the controller.  No problems and no leaks.  The water tasted slightly salty, which was to be expected if sodium chloride was used to regenerate the resin beads (I didn't, but the supplier likely did.).  I plan to use potassium chloride.  In any case, I started using bottled water to drink pending my first regeneration with potassium chloride.  What will it taste like?  Different, no doubt, but any new taste will seem normal after awhile.  I may get a water purification device for drinking water.


So everything is working, and I have glorious hot water again after three weeks without. :-)
My old hard water contained 26 grains per gallon of calcium and magnesium, and now my soft water has less than one gpg!  It feels slippery to the touch.  Towels washed in the soft water are not scratchy.  Soap has suds.  A brush glides through wet washed hair, rather than catching on the mineral-coated hair and pulling it out.  Minerals will not coat the inside of the water heater, nor form a rough layer on the inside of porcelain toilets.  Who knows what hard water would have done to the inside of my new dish washer.  Certainly the white spots that covered my black granite pottery studio sink have disappeared.

Does the new puppy care?  Probably not.


 Next?  Getting ready for a new heating and cooling system (electric heat pump plus new ducting), and enlarging the new master bedroom.

I removed the old gas furnace, disassembling it piece-by-piece, from the attic (except for the freon-filled heat exchanger), and have started insulating all the new PEX water pipes.  I will remove the rest of the steel gas pipes from the attic (since my house is now all-electric), and get the flexible ducting and registers ready for the heat-pump installers, who will put in a large distribution duct running the length of the house.  As always, attic work requires cooler temperatures, so nothing will happen quickly until fall arrives in earnest.

Monday, September 5, 2016

New Water Supply Fail

Did anything go right?  Hard to say.  Certainly it could have gone a lot better.

Switching over to the new water supply system was one of those major milestone, perhaps even the major milestone of the house remodel.  With the kitchen moved to another room, both bathrooms gutted and reconfigured, with a new laundry room, a new water softener, and a new high-efficiency water heater located in the laundry room, the old uninsulated and poorly-executed copper pipe system needed to be replaced.  I've been doing that piecemeal for years, using modern PEX water lines. 

The water softener was recently installed, and the remaining PEX lines added in the attic during a cool weather period.  The water heater still needed a new gas line run, and PVC drain piping installed. 

First, the gas line.  My original plan was to have the new gas line done perhaps a week before I was ready to switch over to the new water system, with the gas line to the old water heater left intact (so I could have hot water during the interim).  I decided to hijack the gas line that was feeding the furnace for the new water heater.  The old steel pipe junction looked like this, with the old water heater branch running off to the right.


So I would remove the pipe coming in from the bottom of the photo and screw in the 1/2" black steel pipe for the new water heater.  I bought pipe at Home Depot (they cut it to length and threaded the ends).  By the time I was ready to install (cool morning), I had decided to switch over to the new water system the next day, so would just cut and cap the line going to the old water heater.  That would leave the "tee" in place, when a reducing elbow would have been cleaner (but would have required a special trip to buy that fitting). 

Unfortunately, there was a nipple (short length of pipe) between the "tee" and the reducing connector that would not come off, so I had to use the next "tee" to the left, which ended up looking like this:


That change meant the pipe dropping down into the laundry room would be six inches over from the planned position, but I thought that would work, until I discovered the expansion tank on the wall was in the way, so I had to make that extra trip to Home Depot anyway to buy a six inch extension and a coupler.  Minor difficulties, to be sure. 

So this is what the water heater hook up (gas and PVC drain lines for condensate and pan) looked like (black gas pipe is at left with shutoff valve, sediment trap, and yellow flexible connector):


With that done, I was ready for water day!  The next morning I shut off the main water valve, opened faucets to drain the old copper pipes, and drained the old water heater.  Then I switched over the temporary PEX lines from the old copper system to the new PEX system for the washing machine, toilet, and pottery studio sink.  That done, it was time to switch over the output of the main pressure reducing valve where the water came into the house.  I had prepared an adapter to the pressure reducer to go from 1" copper to 1" PEX, and knew there could be an incompatibility with the union on the pressure reduction valve.  And there was.  Plan "B" was to re-use both halves of the old union and use a Shark-Bite press-on fitting to tie into the PEX.

That meant a trip to Home Depot for that fitting, and I also needed a new rubber washer for the old union.  Home Depot did not have the washer, but 20 minutes in an old-fashioned hardware store produced one.  I had hoped for a straight-line transition, but this worked (if not optimally):


I opened the main shutoff valve part-way and hoped for the best.  I checked for leaks, and found none, but then heard water flow and discovered that I had left the shut-off valve for the missing guest room toilet open.  Closed that and sopped up the water. 

I had left the water softener bypass valve open, so that the water softener was out of the loop, but the water pressure gauges in the lines were operational, and their readings were troubling — 100 psi — which is what the outside pressure is.  It meant the pressure reducing valve was not working.  It had been working a few months before, or seemed to be — 68 psi.  I adjusted the pressure downward, and the pressure dropped, but it gradually rose again to 100.  That meant there was an internal leak in the valve, and it would have to be replaced. 

I checked the water heater specs, and it would tolerate up to 150 psi, so I opened the shutoff valve to the water heater and let it fill.  Unfortunately, water was soon gushing out of the top of the water heater, around the cold and hot water pipes leading into the tank.  My expensive and complex high-efficiency water heater was defective!

A bit of backstory:  I had noticed maybe a year ago that the pressure relief valve on the side of the water heater was angled to the side, and not pointing straight down as it should have been.  Not a critical thing; it just meant I would have to be creative when I installed the discharge pipe, leading down to the drain pan.  It looked like this:


Apparently the assembler at the factory had wanted to make the valve point straight down, but was unable to do so, but not for lack of trying very hard.  Because I discovered that someone had used a very big wrench to try to turn the valve that didn't want to turn any further.  When I tried to thread in an adapter to install the discharge pipe, it would not go in.  So I looked from below and saw that the the fitting had been flattened on one side from the too-forceful application of the wrench.


That force also apparently did some damage where the pressure relief valve entered the tank, and hence the leakage.  So no hot water.  I have been collecting materials to take to Home Depot to see what the warranty claim process entails, but not fun, and a lot of work to remove the old water heater and install a new one.  A lot of time as well — without hot water :-(

I have ordered a new pressure reducing valve; let's hope that installation goes well.  And until the water pressure is under control, I have not brought the water softener into the loop (it is less tolerant of high pressure).  Hopefully there will be no unpleasant surprises when I bring the water softener on-line.

In the meantime, today I assuaged my disappointment with some demolition.  To wit, removing the old water heater and its platform from the corner of the garage:


And gutting the tub half of the guest bathroom, including cutting the steel tub in half to facilitate its removal out of the house.  (both halves gone now)


Hopefully next time I will have good news about Rheem giving me a new water heater . . .