Every place I've ever lived has been designed for that "average American family," with lots of bedrooms, living room, dining room, family room, etc. The problem was that I was a single person, not an average family. I needed space, but for hobbies, not people. And because I'm over 6'2", bending over to use sinks designed for children was a constant frustration. Over the years, I collected a list of things I would change if I could have my dream house. As I approached retirement, I realized time was running out for that house; it was now or never.
Dreams are not always perfect, however. I could never afford my dream house, a spacious Southern California home overlooking the Pacific Ocean. But I could afford a modest ranch house, with a 20-mile drive to the beach. It was a very long way from perfect, but it had potential.
This blog documents the process of turning that small average house into something that matches my lifestyle. It will be as close to my dream house as I can make it. I'm doing all the work myself to stretch my resources. By not hiring contractors, I can afford high quality materials, and I'll know the job is always done right. The remodeling will be my primary avocation for a few years, even as I try to fit in my writing and other hobbies.
It promises to be an interesting journey, and a challenging one!
Sunday, December 3, 2017
Kitchen Countertop — Part 4
At the end of the last post, I had moved the countertop from the garage to the kitchen. To fasten it to the cabinets, I used a silicone adhesive and screws (from the bottom). After reading the directions to the silicone, I discovered I only had five minutes of open time to get the countertop clamped, so I drilled all the holes beforehand and started the screws. (It really does pay to read the directions.) Then the silicone went on.
I used three 54-pound retaining wall blocks as gravity clamps, then quickly tightened the screws (close to 20 of them).
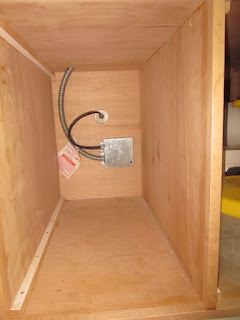
After the silicone adhesive's 24-hour cure time, I installed the cooktop, setting it in the opening, and making the electrical connections (will be behind future drawers).
Then I used silicone caulk to fill the small gap between the sink and the countertop. I intentionally left the gap so the caulk would make a good seal.
I applied a coat of furniture paste wax to the countertop for further protection. I'll add another coat before the clutter returns.
I installed the faucet and made the water supply line connections. While all of this was going on, I had been applying three coats of epoxy to the backsplash, and sanding (same as was done for the countertop). The backsplash was installed to the wall with silicone adhesive, with a bead of silicone caulk under the bottom edge. Done!
Time for recovery. — dismantling the glue-up frame in the garage, and cleaning it all up (so the car can return). Pottery studio cabinets next.


