Every place I've ever lived has been designed for that "average American family," with lots of bedrooms, living room, dining room, family room, etc. The problem was that I was a single person, not an average family. I needed space, but for hobbies, not people. And because I'm over 6'2", bending over to use sinks designed for children was a constant frustration. Over the years, I collected a list of things I would change if I could have my dream house. As I approached retirement, I realized time was running out for that house; it was now or never.
Dreams are not always perfect, however. I could never afford my dream house, a spacious Southern California home overlooking the Pacific Ocean. But I could afford a modest ranch house, with a 20-mile drive to the beach. It was a very long way from perfect, but it had potential.
This blog documents the process of turning that small average house into something that matches my lifestyle. It will be as close to my dream house as I can make it. I'm doing all the work myself to stretch my resources. By not hiring contractors, I can afford high quality materials, and I'll know the job is always done right. The remodeling will be my primary avocation for a few years, even as I try to fit in my writing and other hobbies.
It promises to be an interesting journey, and a challenging one!
Thursday, March 28, 2019
Guest Bathroom - Part 7
Work on the guest bathroom is now done for the time being, to be continued late this year. The bathtub is next, when work continues.
This is one of those posts that goes into the details that are important if you're actually planning to do something like this. If you're looking at this post for general interest, I would advise to just click through the pictures and go back later if you decide you want to know how exactly the process was done. Just saying.
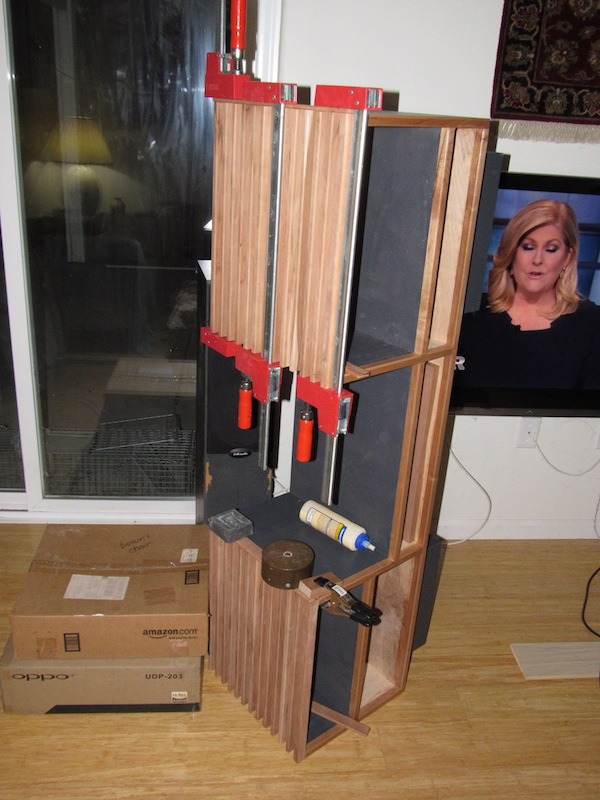
In Part 6 I completed work on the woodworking phase of the vanity top construction. The next step was to apply an epoxy finish to the cherry and rosewood to make them waterproof. The first coat is always rough, because the epoxy soaks in at different rates depending on the grain of the wood — so high in some spots, low in others. I applied the epoxy with a roller, and then used a foam brush dragged lightly along the surface to level it out and eliminate the tiny air bubbles.
After the first coat of epoxy, I used a random orbit sander to take down the high areas, and then dry sanded with a large pad to get the surface level. After the second coat, I wet sanded with 220-grit paper. After the third coat, I started by wet sanding with 320-grit paper, and continued through 2000-grit paper, and then went on to rubbing compound and finished off with furniture paste wax.
I had applied four coats of epoxy to the kitchen countertop, which sees a lot of use every day. The guest bathroom countertop will rarely get used, so I judged three coats to be sufficient. In my remodel/renovation work, I am not aiming for cosmetic perfection, because there is so much work to be done, and I don't want to spend the rest of my life on the house. So much fun stuff waiting! (and waiting)
So this is what the "finished" vanity top looks like:
Down below the top, there was plumbing to connect. Although it would be rarely used, the vanity was not intended to be a museum piece. It needed to be functional, which meant water in and water out. Down below were the connections for the water supply lines and the drain. Starting with this:
And ending with this:
Back above, a mirror was needed — bought from my local glass store. I would frame it with cherry molding — a simple rectangle section with one edge beveled. The mirror would run from wall to wall, and from the top of the backsplash to the ceiling. I found the right side was straight and square to the top of the backsplash, so I glued the molding to the drywall behind on those two sides (using plain wood glue). Gravity clamps worked well.
I did not attempt to attach all four sides of molding first, and then install the mirror, fearing that a slight discrepancy in the left or top wall measurements (they were not precisely straight), would mean the mirror would not fit. Easier to trim the molding afterwards if it did not fit — before I glued it in place. Sigh.
The right side molding went up using a single finish nail to hold it in place while the glue dried. I used mirror mastic (applied with a caulking gun) to attach the mirror against the back wall. Once the mirror was attached in place, I added the molding on the left and top, and filled the small irregular gaps with caulk.
All worked well.
Then lighting for the vanity. An experiment. I had bought a strip of LEDs that I planned to run around the sides and top of the mirror. The self-adhesive strip had peal-off paper backing, so I could stick it up anywhere. But where? I considered a number of alternatives, and then picked one. No idea if it was better or worse than the others. I could have just stuck it to the wall, but I elected to install a triangular section molding a few inches (9 cm) in front of the mirror, and then stick the LED strip to the back of that.
I made the molding from cherry, but it was too prominent, and accentuated by its reflection in the mirror, so I decided to paint it the same off-white as the wall, hoping it would blend in.
The LED strip itself came in a roll and looked like this:
The LEDs needed a nominal 12-volt direct-current power supply. I searched through my collection of old plug-in power supplies (wall warts), but found no 12-volt DC examples. I did have a 9-volt one, which I knew would work, although giving less brightness.
Previously, I had wired an electrical receptacle underneath the vanity, controlled by a switch next to the vanity — for the very purpose of operating an LED light strip. Which is also why I put that pink nylon string through the wall before I closed it up. Now I taped the output wire from the wall wart and pulled it through to the base of the LED molding. Then soldered the wires together and applied heat shrink insulation over the bare solder joint.
Underneath, the wall wart (direct-current power supply):
This is what the LED strip looks like up close (the actual strip on the back of the molding, and the reflection in the mirror):
And the whole thing:
Like I said, this lighting treatment was an experiment, and now that it's done, I think I would have done something more conventional if I had it to do over again. On the other hand, I may decide I like it once I have had a chance to use it.
One thing about the LED strip — I assumed that the adhesive on the back of the strip was applied directly to the strip, so when I pulled off the paper backing, I expected the strip to stick firmly on the molding. Didn't happen that way. Actually, there was a thin strip of double-sided tape between the LED strip and the paper backing. When I pulled the paper backing off, I didn't notice that the sticky tape was sticking to the paper backing (and not the LED strip). So the LED strip did not stick well to the molding, but the paper backing was very sticky. I discovered this halfway through the job, and separated the tape from the paper backing. The second half of the job was good, but I'm having to go back with super-glue to stick the LED strip in place where it's pulling away. Little things, so aggravating!
So now — putting some plants in the ground, some retaining wall work, some exterior scraping and painting. And beginning work on the garage extension. Clean out the garage, sell/give-away the old wide garage door, raise the old garage door header (which supports the garage roof trusses), and then order a big truck-load of wood.
I've started detailed design drawings (to scale), to determine the exact sequence of work, and to prepare a list of every single piece of wood I need to buy. And just picked up the new garage windows today. Will keep me busy for awhile.
Sunday, March 3, 2019
Guest Bathroom — Part 6 + The Drawer Factory
As I mentioned last time, I was initially looking for an acrylic (like Corian) vanity top with an integral sink. The sink had to be small. After discarding the idea of getting another custom Corian countertop for my 18" deep vanity, I looked at other Home Depot stock countertops. They were all for standard 22" vanities. I looked for a drop-in sink, that I could use with a plain (plastic laminate, or wood top — not wanting to spend the big bucks for marble, granite, or quartz, since this was for a bathroom that would seldom be used). No drop-in sinks. I went on Amazon and searched "small bathroom sinks" and found just one — a nice little ceramic undermount sink (for not too many bucks!). Bought it.
You may recall that I had trouble procuring a kitchen countertop, and finally ended up laminating one from strips of maple, cherry, and walnut — and using a stainless steel undermount sink. Applied four coats of epoxy resin to that, successfully, and have been very happy with that.
The guest bathroom vanity top would be a much smaller project — 31" wide by 18" deep, versus the 12.5 foot long by 30" deep kitchen monster. And instead of using strips for the bathroom counter, I used three 6" wide boards glued edge-to-edge.
The sink came with a paper template, so I positioned that on a cardboard template to see where I could eliminate some wood in the middle, then glued the boards together using biscuits to maintain alignment during assembly.
While that dried, I used the cardboard template to mark out the position of the sink, before cutting a hole in the vanity top and then routing a recess to support the sink. Normal people use vanity cabinets that have no top, and hang the undermount sink with clips from the bottom of the countertop. Not me.
The sink instructions warned that the template might not be a perfect fit (given the sometimes unpredictable shrinkage of clay during the firing process), so before cutting a hole in the solid cherry vanity top, I used a simple cardboard gauge to mark my cardboard template with a uniform overlap around the periphery of the sink.
With the corrected sink outline marked on the template, and cut, I transferred that outline to the cherry top and then cut the hole close to (and inside) the line.
Then I used my oscillating spindle sander to smooth out the opening. Because the cardboard template was not real smooth, I sanded to get a smooth curve rather than trying to follow every little irregularity on the line I marked. In the photo, you can see a couple of the biscuit slots I cut for attaching the front edging.
Then I used a router to round over the edge, with a smaller roundover on the bottom where a bead of silicone caulk will eventually be applied between the top and sink.
Now it was time to attach a bullnose edge to the front of the countertop, and make a backsplash. As I had run out of cherry at this point (for matching trim), I decided to use a different wood from my inventory for contrasting trim. In this case, I used rosewood. With that done, I test fit the countertop.
I now have to apply the four coats of epoxy to the countertop and backsplash, sanding it all smooth for a satin finish. The cherry on the cabinet front and trim on the shelves has been given a couple of coats of polyurethane, so it looks darker. Presumably the new bare countertop will darken to match that other cherry once it has its epoxy finish. We'll see.
I also need to do some work on the cabinet itself to accommodate the drain and supply lines. Then, make a frame for and install a mirror, along with the LED strip lighting around the sides and top of the mirror. That work will be the subject of the next post — Part 7.
All of this custom work has pushed the timeline for the guest bathroom down the road a bit, so it's a good thing I didn't order the big bathtub. After I finish up the vanity/mirror work, it will be time to start detailed design work on the garage extension. Bathtub, say hello to the fall.
The Drawer Factory
Nine new drawers this time, all with dovetail joints. Six of these use half-blind dovetail joints, new for me (mostly).
The other three use the more common through-joints, which look like this:
This joint belongs to a new spice drawer for the kitchen, made from maple. I use through-joints when I plan to use drawer slides. My cabinets use inset drawers, so the fronts have to fit precisely in the drawer opening, and the drawer fronts have to extend beyond the sides of the drawers to cover the ends of the drawer slides. The procedure I use is to install the drawer carcass, and then build the front to fit perfectly inside the drawer opening (with small uniform gaps around the periphery), and then position the front exactly before screwing it to the carcass. As always, pictures help.
Here's a photo of the drawer carcass installed with the slides:
This is a spice drawer, so I have installed partitions to limit the contents sliding about. Here is another photo with the front attached to the open drawer.
And the drawer closed. I need to make another two identical drawers below this one (along with about 30-40 others for the kitchen - sigh).
The other two through-joint drawers in this batch include another one for the pottery studio — drawer closed (the shallow top one) and open:
The last of the three through-joint dovetail drawers in this batch is a wide one for the credenza (the other, deeper drawers for the credenza were made from cabinet-grade plywood).
The other six drawers use half-blind dovetail joints. They just slide in and out of the drawer opening without mechanical drawer slides, and so do not need separate drawer fronts applied after they have been installed. They do need to fill up the drawer opening (height-wise) so as not to tip when opened. This type of construction works well when the drawers don't have to carry much weight, and for drawers that don't get much use (although in times past that's how most drawers were built).
Half-blind dovetail joints are easy to make — once the dovetail jig has been set up — because you can cut both pins and tails (fronts and sides) in one pass. Through-joints need two passes for each joint (cutting only one piece of wood at a time). This is what the router cut looks like (in this case the dark wood is the front and the light poplar is the drawer side):
The three master bathroom drawers I was making are fairly tall, and they just slide into the drawer opening (with no wood or metal slides used). The drawer sides had to be as tall as the opening. My half-inch thick cherry boards were not wide enough, so I needed to glue two pieces together to get the required width. Again, I didn't have enough cherry (and the wood store is a three-hour round trip), so I used poplar to gain the needed width. A simple butt joint.
Part of making a nice looking dovetail joint involves sanding the dovetails smooth. They don't just come out nice and pretty after gluing (at least mine don't). Before and after:
I made three small half-blind dovetail drawers for the master bathroom vanity, and another three drawers for the new TV console. These are the three for the master bathroom, open and closed:
That leaves the large (lower left) towel drawer to build (plywood), and the large door for the opening under the sink (that one will be complicated — wait for it).
The last three drawers in this batch were for the TV console (the center shallow drawer open; there is another shallow drawer to its right).
I really need to make more drawers for the kitchen as a priority, but there are also other priorities (the garage, the outside of the house, and on and on). The only certain thing is that I will be building drawers for years. 😧
Wednesday, January 23, 2019
Guest Bathroom — Part 5
This is the photo showing the state of the guest bathroom at the end of Part 4:
The open shelf unit in the photo is just sitting there, not fastened to the wall. I removed it to paint it, then returned it and screwed it to the wall and base. The wires dangling down at the left of the shelf unit are for light switches and electrical receptacles. Obviously they needed to be enclosed, so I added a piece of half-inch plywood flush with the right side of the vanity cabinet.
Also in the photo below, I've added cherry edging to the front edges of the vanity, covering the plywood.
There are two receptacles: 1) one on the right side of the vanity for plugging in all those small appliances people use at the sink, and 2) another one inside the lower vanity, behind the future doors, which will be used for a plug-in power supply (wall wart) for low-voltage electricity for the LED light strip that will run around the future mirror. Power to that receptacle is controlled by a switch just above the vanity receptacle (which of course will then simply turn on the mirror lighting). There is one more light switch on the front of that electrical channel for the overhead light; that switch is a motion-sensing and dimming switch, so when you walk into the bathroom, the light comes on, and when you leave the light goes off. If you're in the bathroom and stay very still, the light shuts off, leaving you in the dark.
Moving right along. In the photo below, I've added cherry to the edges of the open shelving, as well as as a wide piece on the front of the electrical channel. Before putting the cherry on that, I reinforced the channel by screwing in blocks of wood between the plywood on either side of the electrical channel.
Here's a closer look at the electrical switches and vanity receptacle. The pink nylon string running into the hole is so I can pull the wall wart wire up from the inside of the vanity.
Next, I need to find a white acrylic vanity top with an integral sink. I can get a Corian brand one online for something in excess of $600 that may only rarely see use. Hmm, no thanks. Home Depot used to sell generic vanity tops to spec; not apparent that they still do, but that's something I need to check. Then hook up the plumbing. Then buy and mount a mirror and install the LED strip lighting. Then of course there are the four tiny drawers and the two doors for the front of the vanity, but considering I still haven't built the door for the front of the master bathroom vanity . . .
I can order the bathtub and drain any time, but by now I've figured out I shouldn't do that until I'm ready to install it. That could be Part 7. 😮
I've started building a set of nine more drawers — all solid wood dovetail drawers, including six of the half-blind variety. Might these be the subject of my next post? Hard to say.
There are other things I need to do on the house and yard. I mean, not things worthy of a post. Painting stucco. Scraping and painting trim. Extending my retaining wall (after five years of procrastination 🙂 ). Yard work, including transplanting palm and banana trees. I often feel reluctant to do this sort of work because it causes big gaps in blog posting. But so be it. I may throw in a photo. I may do a blog on making a key lime cheesecake. Who knows? Not me.
And I need to adopt another dog.
Sunday, January 13, 2019
TV Console
The first step in building the TV console was designing it. The bottom of the TV is about 22" off the floor, which is one constraint. The center-channel speaker had to be placed just below the center of the TV, and because of its size, there was no space below it for either the blu-ray player or the receiver. I wanted those two components to be as high as possible for easy accessibility, but did not want them to sit on top of a shelf — they should be inside the console, for aesthetic reasons. Those two criteria conflicted, so a compromise was needed.
Because everything has a remote control, the need to have those components up high was lessened. I still had to put discs into the player, and likely put memory sticks into the receiver. So put them just below a top shelf that was close to the bottom of the TV. Receivers get hot, and that heat must be vented, so there had to be free space above the receiver. The blu-ray player doesn't generate a lot of heat, so cooling for that was not critical, but clearly there would not be enough vertical space to put both receiver and player on top of each other. Which led to the decision to put those components on either side of the center channel speaker. That left room for drawers below.
So measure the components and draw the design and cut out the 3/4" plywood for the carcass. Tongue and groove joints, glue, screws, and biscuits for alignment and strength.
I used solid cherry for the trim to cover the plywood edges, and painted the exterior panels a dark blue (same as the credenza), and black for the interior.
At this stage, I moved the console from the garage to the living room, where I assembled and attached the two bases and applied a clear satin polyurethane to the cherry.
You can see there are three bays. The bay for the center channel speaker will have no top. The tops for the blu-ray player and receiver were designed to be far enough above those components for adequate cooling, so they could be solid, but I decided to use grates for the tops to permit the hot air to easily flow up. I decided on half-inch thick cherry slats standing on edge (1" high), and separated by 3/4". I milled pieces of cherry to carry those slats, with shallow 1/2" slots cut to hold the slats in place while gluing. The slots would also ensure even spacing. Forgot to take photos. 😕
I covered the ends of the slats with thin cherry strips (glued on).
So this is what it looks like:
Another view below. While you apparently see three drawers along the bottom of the piece, these are just the fronts of future drawers. Like the last drawer in the credenza, these are dovetail drawers waiting to be built, along with a few more for the pottery studio, kitchen, and master bathroom. Half of these (including the three TV console drawers) will use half-blind dovetail joints, and for all of these I need to set up my dovetail jig and build a bunch of them (for efficiency).
Up Next
Last time I said I was starting on half of the guest bathroom. Well, I'm still going to do that, but I'm also adding in the other half as well — to wit, the deep soaking bathtub. Which means I'll also be doing the tile floor and the tile walls, the drain plumbing for the bathtub, and the plumbing for the tub fill and shower valve, etc., in addition to the vanity sink and its plumbing. I have pretty much decided on an American Standard reinforced acrylic tub that I can order from Home Depot, but have yet to find a source for the sink. This project will likely carry through the whole winter. Sigh.
On a very sad note, my young Australian Shepherd has died. He was just 2 and a half years old. He had epilepsy, and had been having seizures for the last year, which typically lasted about a minute, followed by a complete recovery within another few minutes. But last week a persistent electrical storm ravaged his brain, from which he could not survive. I sorely miss him.
Friday, December 28, 2018
Credenza — Part 2
As my last post concluded, I was working on the drawers for the credenza, as well as the solid cherry top. Because the credenza is a bi-level design, there are actually two tops. Each is made up of three separate pieces of cherry to achieve the full width. The edges of the boards were run through my jointer to make them straight and true, so the glued seams would be without gaps.
Here's a close-up of the biscuit joints that ensure the pieces will remain aligned when they are clamped together.
Here's what the upper top looks like finished. I don't like to use stain because although it would make different pieces of hardwood match, it also hides a lot of the detail in the grain. Wood is not a homogeneous material; each piece is different. In this case, there is a lot of variability in cherry. It doesn't always "match," but I like that.
Here's one of the finished drawers open. Because it's a taller drawer, I used cabinet-grade birch plywood, with a solid cherry front.
Plywood drawers are more difficult to build than solid wood dovetail drawers. They have tongue and groove joints, and need special moldings to cover the edges, which I have to custom make.
The low side of the finished credenza faces the desk, and has two wide drawers. In this photo, the shallower top drawer will be made from solid wood (dovetail joints) when I set up to make the next batch of dovetail drawers. For now, the drawer front is just sitting there propped up by itself for the photo.
The drawers in the upper section of the credenza face away from the desk, toward the kitchen.
The Drawer Factory
I've now made 56 drawers, with maybe another hundred to go (but who's counting).
Included in this latest batch of plywood drawers are two for the kitchen: a deep one for my cereal, and an even bigger one for either a bag of dog food, or my old KitchenAid mixer. I buy my cereal from Trader Joe's, and since it's a long drive, I stock up on cereal and need a deep drawer to hold a good supply. 🙂
And the other big one (opposite side of kitchen):
Next
One of the reasons I was slow to finish the credenza was that I have been working on a couple of other projects concurrently. The next post should present another piece of furniture — a living room "entertainment" console to sit below the wall-mounted flat-panel TV, to hold a blu-ray player, an A/V receiver, and a center channel speaker. It will also have three dovetail drawers. It's about half-way finished, so it should not be a long wait.
I previously planned to start on the garage extension as my next "major" project, but I've now resumed work on the guest bathroom instead. That's likely to be a two-parter, post-wise. Or three. Or four. Sigh.
Thursday, November 8, 2018
Credenza — Part 1
Things must be dragging. Cabinet-building and drawer-making are slow, at least this time. This post isn't even a full accounting of my current project, but since I haven't posted in a long time, I decided to do a Part 1 (and later a Part 2). Hopefully I won't need a Part 3.
The credenza I'm building is a bi-level affair to provide a place for my huge 8-ink 13" x 19" printer, as well as eight drawers for associated office stuff. It sits at right angles at one end of my desk, and the drawers are on the front and the back. The advantage of building custom furniture is that it can fit the space and the specific use.
But the pictures will explain better.
The credenza was constructed in three sections: a high part, a low part, and a base. The high and low sections are each 30" wide, so the credenza ends up 60" wide. Notice the drawer slides were installed before the carcasses were assembled, while I still had good access.
The pieces go together like this:
You may remember that the small pottery studio table I built was painted a dark blue with mostly cherry trim. I liked it so much that I decided to use the same combination for the credenza (plus I already had the paint).
The credenza, when assembled, would be heavy and awkward, so I moved the three pieces separately into the house, and screwed them together in place. Then painted the plywood sections, then added the cherry trim (and put a clear finish on that). To wit, the low end (with printer sitting on top):
The wide drawers (scanner, graphics tablet, printer paper) are accessed from the desk side. The six narrower drawers in the high section will be accessed from the other side:
In the above photo, three of the drawer boxes are just sitting in their cubbies (I have now installed the drawer boxes on their slides, so they pull out). Missing, of course, are the cherry drawer fronts, and the solid cherry credenza tops (separate for upper and lower sections). I need to make another run down to the hardwood store to buy more wood for the tops, and also for some 1/2" thick poplar and maple for dovetail drawer sides. Hence one of the reasons for a Part 2.
The Drawer Factory
So I've also been building about a dozen drawers, out of birch plywood. These drawers are not shallow enough to use solid wood with dovetail joints; the wide thin boards tend to cup (if you can even find boards wide enough). As I mentioned previously, the plywood drawers are also more tedious to build, because the edges need to be covered and reinforced with custom-made maple trim (and I need to buy more stock for that, as well).
But I'm getting there, slowly. Early in the process:
I've now glued these together, complete with bottoms. Quarter-inch thick bottoms for the smaller credenza drawers, half-inch thick for the larger drawers, and one kitchen drawer that will carry a lot of weight got a three-quarter inch thick plywood bottom.
Part 2 of this credenza post will cover the finishing-off of these new drawers, with a diagram detailing joints.
Despite every effort to measure and cut out all the parts precisely, a couple of the drawers did not fit exactly within the two halves of the drawer slides. My table saw is a "contractor's" saw, which means it's perfectly fine for the tolerances needed to build a house, but rather a challenge to get the precision needed for cabinet-making. So a little rework is sometimes required.
One of the wide credenza drawers ended up being about a sixteenth of an inch too wide (1.5 mm) to fit between the drawer slides (which require very accurate tolerances). So I will build a simple router jig to machine off a tiny bit of wood from the sides of the drawer under the slide.
The sides of one of the narrow credenza drawer openings ended up not perfectly parallel, which will require another (hopefully) simple jig to take off a thin wedge from one side of the drawer opening. Unfortunately, it's the smallest opening, perfect width at the front but too narrow at the back, so I will have to maneuver a small router in those tight quarters, and expect the router will block my view of the work. Ugh. Stay tuned to see how that turns out. ☹️
Looking ahead
Drawer work is tedious. It's nice to see (and use) the finished drawers, but they gobble up weeks with little progress to see from one day to the next. Nicer projects in the wings. The second bathroom is beckoning (a small room with a visually gratifying payoff). Even more gratifying will be the garage extension. The concrete work was done a year ago (or even longer). The porch roof was the trial balloon for technique. And that's done.
I had planned to wait until spring, when the rain will be done for another six months (or so), but it's rained just once this "rain year" (fall through spring), with none on the horizon, so I'm anxious to start. The current plan is to break down the big garage project into smaller parts, and do these when the weather allows.
But if not doing the whole job at once, planning demands that the smaller parts of the whole each be able to stand alone. When one part is done, the garage should be weather proof, and still able to be used as a garage. So obviously I can't just start by opening up the roof. Everything below that would have to be ready for the new roof section to quickly go on.
Some of my early projects were broken down into more than ten parts, so that's what I see happening over the winter. New garage roof on in the spring.
Here's a photo of the end of existing beam/garage door header, exposed to get an idea of the challenge. Big. Long. Heavy. Needs to be moved up (about 16"), so bottom is flush with the ceiling. It holds up the roof, so I'll need to build a temporary wall just inside it.
More fun than drawers.


