Every place I've ever lived has been designed for that "average American family," with lots of bedrooms, living room, dining room, family room, etc. The problem was that I was a single person, not an average family. I needed space, but for hobbies, not people. And because I'm over 6'2", bending over to use sinks designed for children was a constant frustration. Over the years, I collected a list of things I would change if I could have my dream house. As I approached retirement, I realized time was running out for that house; it was now or never.


Dreams are not always perfect, however. I could never afford my dream house, a spacious Southern California home overlooking the Pacific Ocean. But I could afford a modest ranch house, with a 20-mile drive to the beach. It was a very long way from perfect, but it had potential.


This blog documents the process of turning that small average house into something that matches my lifestyle. It will be as close to my dream house as I can make it. I'm doing all the work myself to stretch my resources. By not hiring contractors, I can afford high quality materials, and I'll know the job is always done right. The remodeling will be my primary avocation for a few years, even as I try to fit in my writing and other hobbies.


It promises to be an interesting journey, and a challenging one!

Monday, August 24, 2020

Garage — Part 11 + The Drawer Factory

 Forgive me, it's been two months since my last post.  

My time was diverted to yard work after an unfortunate fire abatement order, and then there was that COVID-19 thing which limited trips to buy hardwood for drawers.

But none of that prevented me from posting about the SwissTrax plastic garage floor tiles, which I installed more than a month ago.  So first, the tile install, and then progress on the drawer-building front.  

The SwissTrax tiles are substantially thicker and larger than the Weather Tech tiles I installed in my music workshop, but the installation method was substantially the same.  Two edges of the tile have loops and two have prongs that go into the loops on the next tile, locking them together.  Here are photos of the top and bottom of one tile (cut in half).

As with the Weather Tech tiles, I cut them to fit (at the edges of the garage) with my band saw, and fit them together with the aid of a hefty rubber mallet.  Knee pads are advisable for old knees.  I started at the front and worked my way to the back, moving large tools from the concrete on to the finished tiled surface as I made my way toward the back.

I inserted a stripe of darker color tile to aid in aligning the car as I back into the garage.  There are special beveled (black) tile pieces that can be installed at the front edge to ease the car up onto the thick tile.

Here's what the finished floor looks like (toward the west), and another shot looking toward the east:

And of course these tiles are designed to have cars rolling on them.  The tiles are an incentive to keep the floor clean. :-)

The Drawer Factory

I build drawers in batches, because a lot of the time required is for setting up the table saw for the tongue and groove cuts, and for the dovetail jig for the solid wood drawers.  I use plywood for drawers that are too deep (vertical) to practically use very wide boards (which tend to cup).  Making nice plywood drawers is actually more time consuming than making solid wood dovetail-joint drawers, so plywood drawers are not inferior (although dovetail joints look more impressive.  

Either way, it pays to cut as many drawer pieces as practicable, once the tools have been set up.

For the current drawer effort, I planned to build ten plywood drawers and sixteen dovetail joint drawers.  I started making the plywood drawers first, and cut out all the sides, fronts and backs, but ran out of half-inch plywood before cutting out the last two drawer bottoms.  I had enough maple for most of the edging (to cover and reinforce the plywood edges).  Here is the stack of fronts, backs, and sides (before cutting tongues and grooves):

Here is one of the drawer carcasses (for kitchen), clear-coated and installed:

This drawer (above) will get a maple front.  I installed another drawer to the right, and had enough materials to make the maple and laminate drawer front (although it's not yet finished or installed, and no drawer pull either).  Here's the front just sitting in place:

The garage workbench gets fourteen drawers, six of which are plywood.  Four carcasses were completed with two coats of clear finish, but the other two are still waiting for drawer bottoms.  I went to Home Depot to get another sheet of plywood for that, but their panel saw was out of order, and because of COVID, they didn't know when they could get someone to come in to fix it.  Whole four-by-eight sheets of plywood will of course not fit in my car.  

These workbench drawers also need hardwood fronts, which will require a two-plus hour round-trip drive to the wood store.  I've been limiting trips to stores because of COVID, so it will be a while longer before these are done.  The eight drawers above these plywood drawers will be made of hardwood (poplar) with some variety of hardwood fronts (and half-blind dovetail joints).  Altogether, sixteen dovetail drawers waiting for wood.  Sigh.

In my last post, I showed the installation of drawer slides in the workbench before that was assembled.  I was not so prescient during the construction of the kitchen cabinets, so I now have to install those drawer slides after the fact.  The challenge looks like this:


 The only drawers I completely finished in this batch were those for the master bathroom vanity, and actually this was just one drawer and the door for the open space under the sink.  These two pieces completed the bathroom, and have been missing for years, so I'm very happy to have finished them.  And they're fancy!

I built the vanity from scratch.  It's 40" high (compared to s stock 26" vanity) — nice since I'm about 6'3" (189 cm).  The front is mahogany, mostly an impressive striped mahogany that I found at my hardwood supply store.  They only had a small quantity, and the other drawer fronts used almost all of my supply.  I only had a few pieces left.

This would not be enough to for the door and the front for the large towel drawer, but it would be enough to frame the fronts.  I had a another piece of nice mahogany that I had bought many years ago for guitar construction, so I decided to use some of this for the field.  Given the size of the fronts, I decided to glue strips of this mahogany onto pieces of half-inch plywood.  The mahogany would end up being a quarter-inch thick.  

So I first sliced the mahogany thicker than the end quarter-inch, using my band saw fitted with a carbide resaw blade.

Then I ran the edges through the jointer so they would butt up against each other perfectly.  The plywood and mahogany pieces were all cut larger than the desired end dimension.  

Test fit, then wood glue was applied on the bottoms and edges of the mahogany, then weights and clamps held it all in place while the glue dried.

The glued-up front blanks were then cut to their finished dimensions, and run through the thickness planer to the final 3/4" thickness, which also made the front perfectly flat.

The striped mahogany edges were then cut out and trued in the jointer, and glued to the center panel using biscuits for alignment.

The door got European-style inset hinges.

Here's the towel drawer finished (not all the way open):

And the completed vanity (finally):

Next time: either progress on this current 26-drawer effort, or a report on a new front walkway. 

Tuesday, June 23, 2020

Tool room transformation — Weather Tech floor tiles

When I bought the house in 2013, it had four bedrooms—I only needed one.  The back bedroom had initially been created by a former owner by partitioning off the back part of the garage.  This left me with a garage that was too short (in fact, the prior occupant was using the garage as a fifth bedroom, complete with carpet).  To make the garage usable, I added six feet to the front (the subject of many blog posts).  I completed the first phase of that fourth bedroom remodel (windows, structure, upgraded electrics, etc.) years ago, and then started using it as a tool room, basically a place to store the tools and supplies I needed to do my remodel/renovation.  It became a disorganized mess.


Since I no longer needed it as a bedroom, it didn't need a closet, so I repatriated that precious space back to the garage.  The former closet opening then had to be walled off.  And to cover the old opening with drywall, I first had to dismantle and remove the heavy-duty shelves from the wall on that side of the room (along with all the tools piled high).


Then add drywall.


And joint compound and paint.  Then it was time to rip up the remainder of the old carpeting, and scrape the concrete floor clean.  While searching for possible plastic floor tiles for the garage, I discovered that Weather Tech (automotive floor mats, etc.) also made floor tiles, but they were only a quarter-inch thick, and not ideal for a garage floor.  But I thought they would do well for my new music-room/instrument workshop (I build electric guitars and basses, steel-string and classical acoustic guitars, and violins).

After placing a few on the floor and walking on them, I discovered they were noisy—mostly caused by the hard plastic clacking on the concrete when you stepped on them.  So I first put down an eighth-inch insulated underlayment, which was the same as I used under my bamboo flooring.  It did the job.

The floor tiles have interlocking edges that need to be pounded together with a rubber mallet; the most effective technique is discovered fairly quickly.


The tiles around at least two of the edges of the floor need to be cut.  I saw on some videos of Swiss Trax installations that cutting with a table saw could melt the plastic, so I used a narrow blade on my band saw and pushed the tile through quickly to minimize heat.  It worked well. 


So here are a couple of photos of the finished room:


Of course, it doesn't look like this anymore, since music room furnishings and much of the stuff I moved out (and didn't throw away) had to be moved back in while the garage is being completed.

I'm happy with the floor.  I will compare it with the Swiss Trax tile when I install that flooring in the garage. 

First I need to build the next group of about twenty-two more drawers.  Drawer factory.

Garage — Part 10 (the inside)

It's been four months since my last post.  Sigh.  My old goal was to do two posts per month, so obviously slow going.  I've been doing a lot of work, but finishing off the inside of the garage was a lot of the same thing, so not conducive to several installments.  And there is still the matter of the high-maintenance puppies—now eight months old—interfering with remodeling time.

When last I reported, I was waiting for a delivery of drywall.  So this post will cover putting up drywall, joint compound, window trim, painting, and cabinets.  At the same time I added one of the sheets of drywall to finish off the back-side of the garage wall, in the adjacent work room.  I ended up finishing off that room, which will be a separate post (also written today).

As I reviewed my photos for this project, I found I had few of hanging drywall and applying joint compound (and sanding).  Likewise painting all that.  I've had previous posts going into more detail on those mundane chores, so for this post, there will be just a few photos (and few words).  Most will be about the workbench cabinet I built to house tools (14 drawers), and provide a benchtop for miter saw, dovetail jig, vise, etc.

The house remodel has been something of a musical chair evolution, with my stuff being shuffled around from room to room, waiting until everything finds its permanent place (or sold or trashed).  So, clear out a room (moving everything someplace else), remodel the room, and then find space for the stuff inhabiting the next room.

So the "beauty shots" of the garage will have to wait until it gets its new floor and drawers made for the new cabinets.  Otherwise, there will be clutter.

On with the show.


Drywall starts to go up.  You can see what had been a closet in the back room, that space now reclaimed for the garage.  On the upper right, I've screwed a sheet of 5/8" plywood to the wall where solar system/battery storage electrics will be attached later this year—there will be a post for that.

In the next photo, the west wall has been covered with drywall and painted.  There are three pairs of large dowels inserted into the wall (into holes drilled into two 4x4s used in lieu of 2x4s when that wall was framed as part of the bedroom expansion—wall moved 21" into old garage space).  My three ladders will be hung on the dowels.


On the right side of the above photo, there is a recess in the new garage extension.  I built shelves in this space, with a drawer unit.  Drawer slides were installed before this drawer unit was assembled; drawers not yet built.  This:


I also installed the drawer slides in the six-foot wide workbench cabinet for the garage, while it was still in pieces.  It's very difficult to install the slides after the cabinet has been put together (something learned the hard way), and accuracy also suffers.  If you install the slides while the cabinet is still in pieces, everything can be open and flat on a workbench.


The base for the cabinet was made from 2x6s cut down to a 5" width.  Construction lumber often is of variable width, depending on how dry it was when cut, and how dry it is when you get it.  Make sure all pieces are uniformly dry, or each piece could end up a different width after a couple of months, after shrinkage—with poor results.


This is the cabinet carcass assembled, without the top and front trim.


Trim on the front plywood edges is just 3/4" x 3/4" pine, attached with some glue and finish nails.  I used a pneumatic nailer, which ordinarily gives excellent results, but if the nail gun is not aimed at right angles, the nail can veer out.  In this case, I was holding the trim in place with my hand, negligently, just where the nail was being placed, and the nail went through my finger.  Actually very little pain, and with immediate washing, antibiotic ointment and bandaging for a few days, it healed well.  Could have been a different story had the nail hit a bone or something else important.


For the cabinet top, I elected to use plain kiln-dried 2x4s, run through my jointer and thickness planer (to 1.25" thick), and glued together with biscuits.  I did that in three separate sections, then ran each section through the planer and trued each edge in the jointer, and then glued the three sections together.  I used a couple of pieces of mahogany I had for visual interest, and coated top and bottom with epoxy.  Nothing fancy.  It will have things screwed and bolted into it, and get dinged up.  The glue-up:


Below is a photo of the cabinet, minus the fourteen drawers—six heavy duty use with full extension drawers slides, and eight more without slides.  I'll be doing a separate post on a marathon drawer building session (for garage, kitchen, bathroom, pottery studio), hopefully soon.

This will give you an idea of what the cabinet will look like, as well as a couple of the new windows trimmed out.


I'm going to do the post on the back room remodel later today.  It's going to be the music room/instrument-building workshop.  The floor is covered with Weather Tech plastic floor tiles, which I had considered for the garage, but not heavy-duty enough.

I will be doing a separate post on the garage floor, which will use thick Swiss Trax plastic floor tiles, bought from Home Depot.  I will post more photos of the completed garage when all that happens.

There is also now a new Tesla Model Y in my garage, so that will be another "garage" post, hopefully with a demo video explaining features, including magnetic braking and one-pedal driving.


Wednesday, February 19, 2020

Garage Extension — Part 9 (old interior)

So the actual new garage extension is pretty much done, but the rest of the associated garage remodel is in progress and involves a substantial amount of work.  Once complete, I can get the planned solar/battery storage system installed (in the garage).

Work is moving along at a deliberate pace, that is to say, not terribly fast.  This is because the puppies are still, well, puppies, and so high maintenance.  They're each eating five cups of food a day, and drinking a prodigious amount water — and growing like weeds, all of which means they need to be taken out to pee and poop at frequent intervals.  Overnight excursions are now down to two, from three or four.  I'm looking forward to them getting big enough to last the whole night without a potty break.


But I digress.

The old part of the garage was outfitted with the last remaining single-glazed, aluminum-framed window (a slider) in the house.  The best that could be said for it was that it let in light, but also heat, cold, and noise, and oh, by the way, it wouldn't open.  So it had to go.

In its place I installed two new smaller fixed windows (in addition to an identical window that went in the new section of the same side wall).  The first of these two new windows I put in a solid part of the wall.  That involved reframing on the inside, and cutting out a big rectangle of stucco on the outside.  The header still to be installed.


I cut out the stucco using a circular saw fitted with a diamond masonry blade:


The integral window flange was then fastened to the framing.


Further along down the wall was the old window.  The stucco had to be cut out around the periphery to remove the window, which surprisingly was only attached with about four nails (plus the stucco). (I've stapled sheet plastic in this photo to keep the breeze out.)

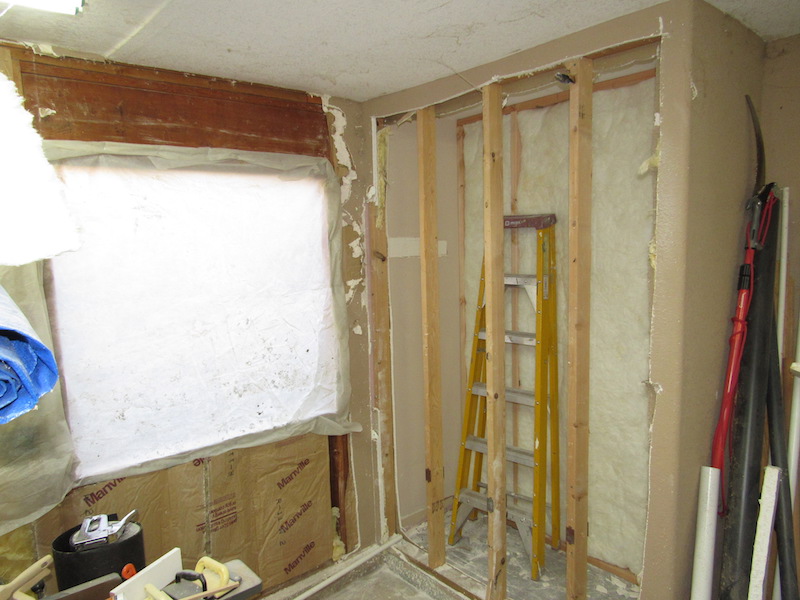
Also in this photo you can see the work started to recover the space taken from the garage for a closet for the back bedroom (my new stringed instrument workshop, not needing a closet).  For that, I framed off the closet opening, and in this photo, have removed the drywall and insulation from the old closet back wall (old studs still remain at this point).


The old window had a substantial header over it, which I left in place; removing would have been a lot of work, without any advantage.  So I reframed for the smaller window within the larger opening.

In this photo, the studs for the old closet back wall have been removed, except where connected to the ceiling and floor.


 From the outside, this shows the old window cut out, and new framing (plywood was then fastened over the part of the opening around the new window):


And here's the new window installed:


Black building paper and a couple layers of wire mesh went on, followed by new stucco.


What it looks like on the inside, ready for insulation (recycled wherever possible).


And here it is, ready for new drywall:


Before the insulation went in, rough electrical for new receptacles and recessed lights was  installed.  A Home Depot delivery is on the way with ten sheets of drywall (plus more plywood for new garage cabinets, a pallet of retaining wall blocks, and 720 pavers for a new front walk).  Next post should therefore be on drywall and paint.  Window trim after that, and on and on.  Sigh.

Tuesday, January 21, 2020

Urinal water supply and other plumbing upgrades

So the plan was to start working on the garage interior next — to get that finished so the solar panels and battery storage system could be installed, but because the puppies still require more or less constant attention, I chose a project that could be done in short snippets.  To wit — providing a soft water supply for my urinal.

When I first installed it, instructions were not very helpful.  Urinals are still not mainstream in residences, so it's a commercial plumber thing.  I did talk to the Kohler people who said 1/2" supply lines would be inadequate, and at least 50 psi pressure would be required.  So I used a full 1" PEX supply line, and set my water pressure at a fairly standard 55 psi.  So far, so good.

But then I found a fine print mention that the urinal flush valve needed a 30 gallon per minute (GPM) flow rate.  That would ordinarily not be a problem with 55 psi and 1" supply lines, but I had a water softener.  That works by running the incoming mineral-laden hard water through a large tank full of resin beads, which slows the flow rate to just 10 gpm.

The only solution that came to mind was to take the urinal water supply from the line before it passed through the water softener.  The downside to that is the minerals in Southern California's very hard water would clog the valves inside the flush unit and also coat the porcelain inside the bowl, allowing stains to stick.

Well, a few years after installing the urinal, the valves did indeed become clogged, and the flushing became ineffective.  I had dealt with the staining by using an acid cleaner to dissolve the mineral deposits, but that was a constant cleaning chore.  So what to do?

I remembered from a house I owned many years ago, that I had installed a large water pressure tank so the submersible pump did not have to start and stop every time I used some water.  Instead, the pump would half-fill the water pressure tank (half air and half water, separated by a rubber membrane).  When you turned on a faucet, or flushed the toilet, the air pressure would force water from the tank out the faucet without the pump needing to turn on (until after you used 10 or 20 gallons of water).

With the urinal, I could install a two-gallon pressure tank between the water softener and the urinal.  So when I flushed, the pressure in the line would drop a little, triggering the air pressure in the tank to force its water into the supply line, supplementing the inadequate flow from the softener.  Since the urinal flush valve only uses a half gallon of water, a two-gallon pressure tank is plenty big.

So where to start?

First, plug up the old 1" line upstream from the water softener.  It's the line branching off to the left.


Cut it and add a plug.


Next, insert a tee-fitting in the 1" PEX line coming from the water softener, and connect the new supply line to the urinal (it's the one heading off to the lower right).


Then add the pressure tank to that new supply line.


And then just replace all the insulation.  Done.

A couple of days after I ordered the parts for that job, I noticed water coming up from between the side of my house in the back where the outside faucet is, and the concrete apron next to that.  I also noticed that my water usage for the month of December was about a thousand gallons higher than it should have been.  Ouch!

The problems with the PVC irrigation circuit that came with the house were 1) the PVC pipe and its connections are weak, and 2) the outside water supply (irrigation and hoses, etc.) branched off the main water supply pipe coming into the house before it passed though the pressure reduction valve.  I had replaced that valve because the one I inherited was broken.  The city water pressure is very high (110 psi).  I suppose that is desirable if you have a large high-volume sprinkler system (I didn't), but not at all desirable for the integrity of the outside plumbing (my neighbors are constantly repairing leaks).

No doubt this extremely high pressure contributed (or caused) the leak in my back yard water pipes, so I decided to fix the high pressure problem first and then attack the back faucet replacement.

So this is what the water supply lines looked like where they enter my house (in the garage).  Most is new I installed; the old copper is at the bottom.  Going straight up at the left is the main 1" PEX water line for the inside of the house.  On the right going up is the 3/4" PEX supply for the front faucet and continuing up goes to the back yard.


What I decided to do was to run all the water (inside and out) through the one pressure reduction valve rather than adding a second pressure reduction valve for the outside water.  ( I decided I was going to set the pressure the same for both, so the one valve was good).  So I needed to cap or plug the outside line bypassing the pressure reduction valve, and tap into the main 1" PEX line downstream from the pressure reduction valve (line going up from the valve in the photo) for the new outside water.

Here's a closeup of the old lower section (below).  In the best of worlds, the line would be capped close to where it branched out from the main water line coming into the garage (from underneath the concrete slab), at point A.  That would involve cutting off the copper pipe and cleaning it up, then soldering on a cap.  But that old pipe is a mess, and the inlet pipe can't really be drained of water, so heating up the pipe with a torch would be problematic, and if a problem ensued, the house would be out of water for the duration.

The shutoff valve for the outside water supply (B) leaks, so that was also a problem, but it was going to be replaced in any case.  I decided to cap the line in another location, to wit — "C".  That's one of the new PEX lines, and easy to plug.


The new PEX water supply is shown in the photo below.  The new outside line is now taken off the pressure regulated main 1" PEX line.  A new shutoff valve is installed in the cross PEX line, and runs into the outside lines.


So now that the outside water line pressure was under control, it was time to repair the back yard faucet, which was a mess.  This was the last bit of the original water supply lines that I had not replaced.  Notice the PVC pipe leading down from the broken faucet, into the concrete.


The handle on that old outside faucet had broken off years ago, so I was using another faucet connected to the underground PVC irrigation system (that I never used).  A few years ago I dug down a bit to see how much buried PVC pipe was was (there was another faucet at the back edge of the yard).  There seemed to be some leakage at that time, but I stopped digging for some reason.  But this is the faucet I've been using:


But back to that broken faucet — cut off — and stucco cut open:


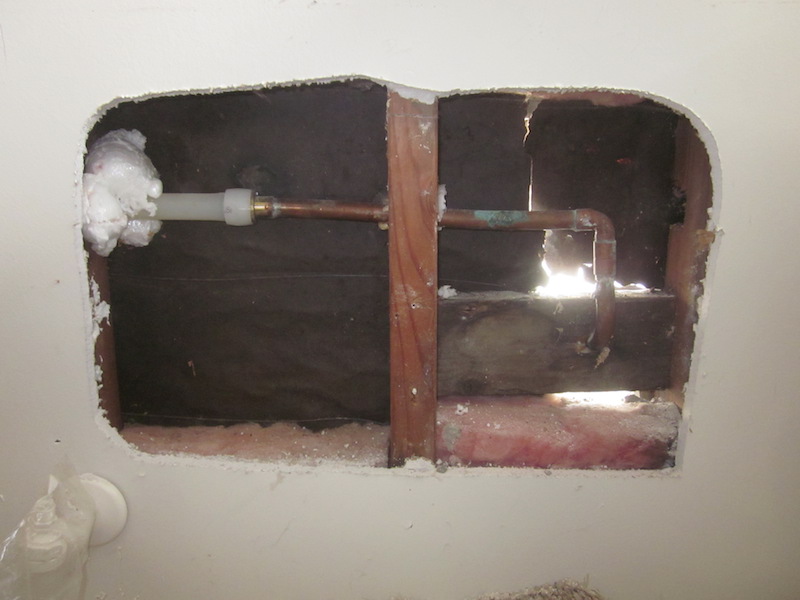
On the inside of the wall you can see how I connected (a few years ago) the new PEX line from the garage to the copper pipe feeding the outside faucet:


And here is the replacement supply line, with new faucet:


This photo shows this last new section of the puzzle (before installation):


What it looks like from the outside, installed:


I'm now in the process of replacing the drywall on the inside and adding new stucco to the outside.

Now that my leaky water supply problem is fixed, I can get back to work on the garage.