First, putting down the new bamboo floor in the master bedroom. This did not actually take very long to do, but I had to order more bamboo flooring, and that took a week to arrive, and then they wanted you to take it out of the boxes to acclimate it to the humidity in the house before putting it down. And, they also wanted you to intermix batches, so that any variations in appearance would be distributed evenly (rather than having half the floor one shade and the other half looking slightly different).
As it turned out, the new flooring was a perfect match cosmetically to the old stuff, which I suppose is remarkable, considering that I bought the first four boxes two years ago. What was different, I discovered, was the design of the tongues (this flooring was of the click-together variety—no gluing or nailing). The new tongue design made the flooring go together much more easily than the old — a good thing, but it did not go together at all with the old tongue design.
So I ended up covering the first two-thirds of the floor with the old boards, and then machined the edge of one row of the new boards so they would butt up tight with the last row of the old boards. No click this way — I had to glue them together. But after that, all was good.
The 21" floor extension that I built into the garage was not perfectly flush everywhere with the main part of the concrete floor, so I had to level this. I ground down some concrete, and sanded down some wood, and for most of the out-of-level area, I troweled down some floor leveler. I ended up using thin-set mortar for this, and it worked well. Looked like this while still wet:

With the floor clean and level, I put down a special underlayment for floating floors (flooring not nailed or glued to the sub-floor/concrete). This layer acts as a moisture barrier and also provides a little cushioning, perhaps making the floor quieter. The first row needed to be cut to fit the marble threshold to the bathroom. The instructions also mandated a gap around the edge of the room to allow for expansion and contraction. The gap would be covered by the baseboard. Hopefully no gap will open at the marble threshold.

So row after row it went down. Clicks together along the length and also the ends of each board. At the end of each row, the board is cut to length, and the piece of flooring cut off can then be used at the other side of the room. Joints are staggered. The finished floor:


The staggered stack of flooring planks sitting in the middle of the room is acclimating while waiting to go down in the hallway. I still have to apply the baseboard. And here is the transition between the bathroom and bedroom floors.

The second thing I've been working on was getting the attic ready for the heatpump contractor. They will be coming out in a few days to assess the job in order to give me a price. I gave them a big package describing the work in detail, with photos. Will be nice to get that done.
Here are a few photos of the attic. One important step was providing a workable passageway between the attic stairs in the garage, and the main part of the attic (over the house proper). There are a couple of hatches in the ceiling for access from the house, but trying to get big sections of rigid ducting up through those would be impossible. Originally, there was a solid wall between the garage attic and the "house" attic. I have opened up a large passageway, with added structural reinforcement. I've also put down some plywood over a good number of PEX water supply lines that crossed over from the front and back of the house, to protect them.

In the next photo, you can see toward the left middle, one of the access hatches (with the hatch in place), and just to the right of that is a filter. The filter was below the furnace air return duct, now removed, and is where the outflow of the air handler will come up from the laundry/utility room into the attic. The heat pump contractor will install a large rectangular section rigid duct that will go from there, and turn the corner and go along the center of the house. Eight flexible ducts (shiny snake-like things) will take conditioned air from the new central duct and carry it to separate room registers. The flexible ducts and registers are in place now (part of what I have been doing).

Looking down the attic toward the west end of the house are more flexible ducts. I have disassembled and removed the furnace from the attic, but left the heat exchanger, because this still contains the air conditioning refrigerant that must be recovered by the contractor.
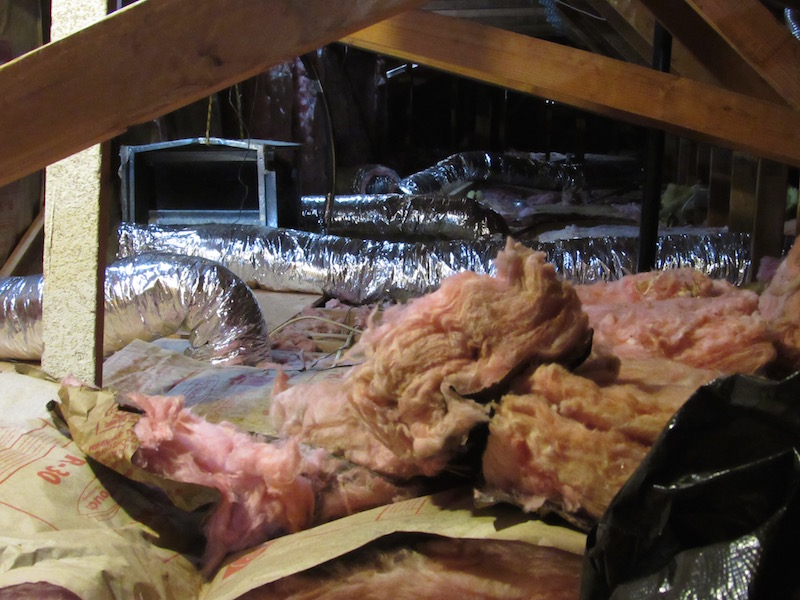
I'm still sorting out the old insulation and adding a lot more and that will continue, especially after the new ducting has been installed. At least 10" of insulation will cover all the ducting and water supply lines.
Also upcoming:
• Baseboards and door moldings in the master bedroom.
• Cabinets for the pottery studio (I would like to get that operational).
• Base for my waterbed mattress.
• Removing the rest of the chimney and finishing that outside wall with stucco (lest a storm blow away the plastic and soak the inside of the wall with water).