Here in San Diego county it doesn’t rain much. By that I mean it doesn’t rain at all between April and October. With the heat and intense sunshine, if you don’t water the plants, there will be no plants—well, maybe some cacti.
So, I’ve been dragging a hose around with sprinkler and hand nozzle attached. With a fairly big front and back yard, and an increasing number of plants to maintain, it’s been hit or miss for many of the plants. Too little water. The sprinklers spread the water around a big area, on the surface, with little penetrating down deep.
My plants were struggling.
So time to do irrigation. Almost all homes around here have irrigation systems permanently connected to the water system, and on electronic timers. Most control sprinklers fed by buried rigid PVC pipes, that shower the whole yard with water, and not infrequently with some of that water running into the street.
The other option is drip irrigation. It puts water where it’s needed, and only where it’s needed—just dribbling it out so it soaks down into the ground. Evaporation losses are minimized. Because the flow rate is low, the water runs for a longer period of time.
So, every plant gets its own private dribble of water, which means the distribution system meanders all over your yard. I used the 1/2” flexible poly tubing (0.7” outside diameter) that Home Depot sells. To provide flexibility in watering, and to avoid undue pressure drops at the end of a very long tube, it’s a good idea to lay out the system using a number of separate circuits. The detailed instruction book outlines a procedure for calculating pressure drop, water flow, etc. to determine the length of each circuit.
I just ad libbed. Four circuits for the front yard and four for the back yard. I planned to compensate for water delivery irregularities by adding extra emitters or adjusting water flow rate at the faucet.
Oh, yes. The system I installed has basic manual operation—no automatic timers for each circuit (like just about everyone else has, no doubt because their systems were professionally installed). You can include the electronic timers/valves with a little extra effort if you want. I wanted simple and basic.
So, to begin.
Instead of plumbing the irrigation system into the house’s internal water supply, I used short lengths of garden hose connected to the outdoor water faucets, using splitters, so I could still use my regular garden hoses for extra watering. I used a nice metal splitter in front, and a cheap plastic one in back. Both seem to work well.

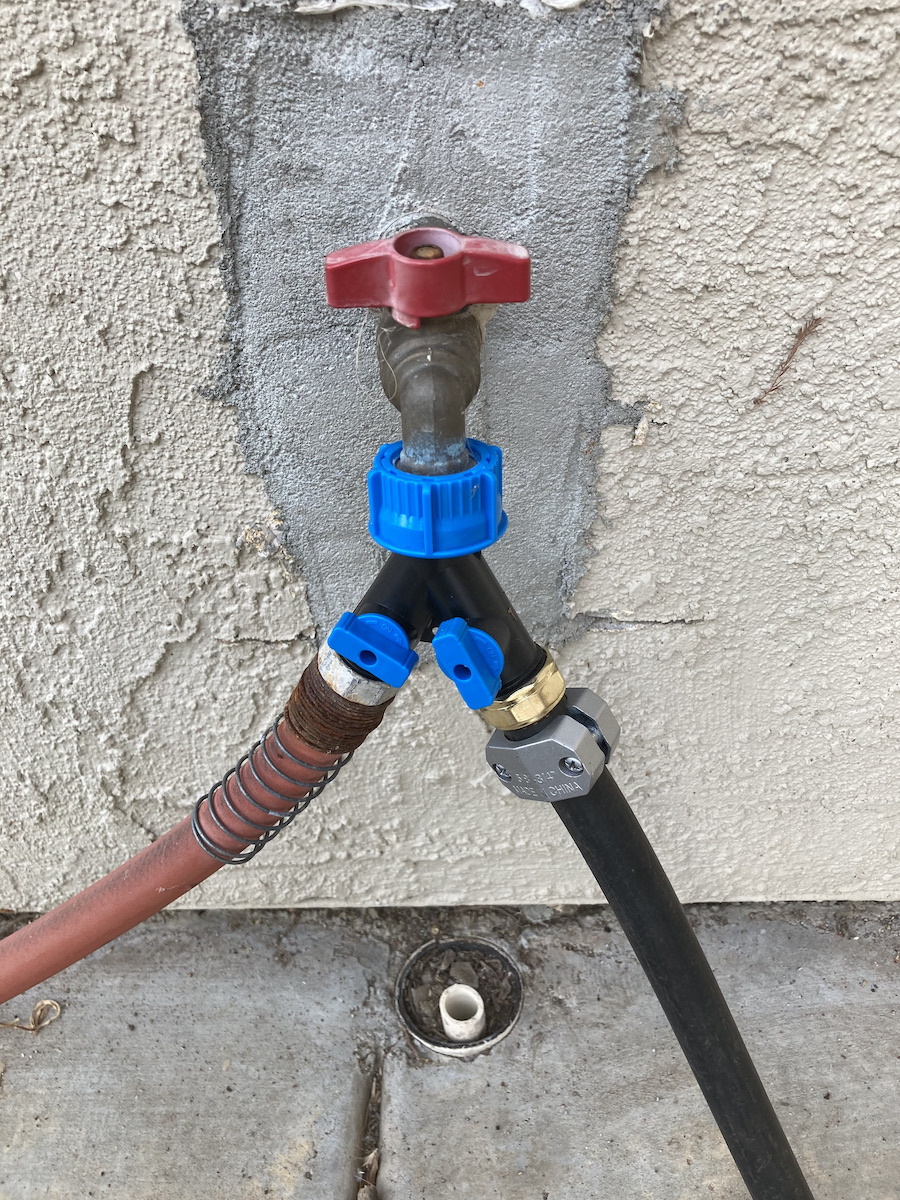
The hoses run from the faucets to the irrigation manifolds, constructed from PVC pipe and fittings, with each of the circuits getting a separate PVC valve—four in the front and four in back.
When I started putting in my walkway, I realized I would need to run the irrigation line from one side to the other, so at that time I buried a rigid PVC pipe underneath the walkway, with connections at suitable places.
The locations of the circuits in the front yard required that there be two manifolds, one on either side of the walkway, two valves for each manifold. I added the required back-flow preventer (one-way valve) at the entrance to the first manifold. This is a code requirement so that possibly tainted water can not work its way into the household water piping (which is unlikely for my manually controlled system).


Here’s the four-circuit backyard manifold before I half-buried it. If contains a combined back-flow preventer and separate flow valve, and is assembled from various PVC fittings. There are black adapters to transition from the white PVC pipe to the black or brown flexible Poly tubing. As with the other irrigation tube fittings, the tubing is connected to the irrigation fittings by pushing it in firmly while wiggling and twisting it. There are tapered ridges inside the fitting that let the tubing go in but not pull out. It helps for the tubing to be warm.

Because the back yard manifold was somewhat long, I added an extension that would be half-buried to stabilize the manifold at the exit end.

The tubing for each circuit is then laid out and staked. In high traffic areas I buried the tubing in shallow trenches running from plant to plant.

For larger trees, I looped the tubing around the periphery, with several emitters spaced around the loop.

You use a special punch to make holes in the tubing to insert the water “emitters.” Alternatively, you can insert a fitting and attach a smaller 1/4” tube to transport water to a plant that lives off to the side of the main larger tube.

There are many different drip water emitters to choose from. There are flag emitters, button emitters, pressure compensated emitters, emitters with valves to adjust flow rate. You can get emitters that set flow to one, two, or four gallons per hour (although you can also change the flow rate by adjusting how much the faucet is opened).


A circuit does not have to be one tube; you can insert a tee fitting to have a tube run off to the side of the main line.

It’s a “drip” irrigation system, but if you turn the pressure up, there will be a constant little stream coming out of the emitter. You can also get emitters that don’t drip, but rather spray or mist (albeit on a small scale). These are useful for plants that are clustered together. I used these sprayer/misters in my high-density raised vegetable garden in the back yard.

They were even more useful in the raised tree island in the front yard, that has wild flowers profusely growing around the Australia Willow (along with a cucumber vine).

Finally, with the drip irrigation system in place, I just took delivery of 30 cubic yards of mulch, which I’m distributing over all the bare ground—trying to keep some moisture in the soil. The mulch covers the irrigation tubing. The emitters are also buried, but they work just fine that way.

In the couple of weeks since I started using the system, I’ve noted a significant improvement in plant health. Hooray!
