Every place I've ever lived has been designed for that "average American family," with lots of bedrooms, living room, dining room, family room, etc. The problem was that I was a single person, not an average family. I needed space, but for hobbies, not people. And because I'm over 6'2", bending over to use sinks designed for children was a constant frustration. Over the years, I collected a list of things I would change if I could have my dream house. As I approached retirement, I realized time was running out for that house; it was now or never.


Dreams are not always perfect, however. I could never afford my dream house, a spacious Southern California home overlooking the Pacific Ocean. But I could afford a modest ranch house, with a 20-mile drive to the beach. It was a very long way from perfect, but it had potential.


This blog documents the process of turning that small average house into something that matches my lifestyle. It will be as close to my dream house as I can make it. I'm doing all the work myself to stretch my resources. By not hiring contractors, I can afford high quality materials, and I'll know the job is always done right. The remodeling will be my primary avocation for a few years, even as I try to fit in my writing and other hobbies.


It promises to be an interesting journey, and a challenging one!

Sunday, June 15, 2014

The New Kitchen - Part Two

I've been working on the new front door/foyer, but after temporarily running out of materials, shifted work to the new windows for the new kitchen (a picture window over an awning window).  I spent a couple of days doing all the preparatory work, so I could open up the wall, put the new windows in, and close everything up in one day.  The next day (today), I insulated the wall and put up drywall on the interior.  I'm going to Home Depot tomorrow, so I'll be back at work on the foyer.

Here is what the old windows looked like from the outside.  As my brother noted, corner windows were popular in a certain era out here in Southern California, but in any case, I needed the windows to be in the center of the room for my new kitchen.  I removed the smaller corner window during early work on the new front door, and filled up that hole.  The new work dealt with the big, front-facing window.


To start, I removed the drywall and insulation from around the old window and where the new window would be, then removed as much of the superfluous framing as I could (without having the wall collapse!).


The afternoon before the big day, I removed the thick masonite shingles and the heavy white trim boards from the outside of the wall.


Then, first thing in the morning, I removed the window.  Just a few nails held the flimsy aluminum frame to the wall.


I could then remove the framing for the old window, including the substantial header (the large beam that spanned across the top of the window, supporting the roof).  I had cut all the new framing pieces the day before (including a new header), so I used my pneumatic nail gun to fasten those in place.


I still needed to cover the part of the wall with sheathing where the old window had been.  I discovered the old sheathing was only 3/8" thick, and I had only 1/2" sheathing (plywood), so I had to replace the thinner plywood everywhere the new windows would be fastened, so they would be going on a flat surface.  The difference in thickness would not matter elsewhere, because I will be covering the wall with stucco (later) which will accommodate any irregularities.  Then I installed the window (the easy part of the whole job), after apply some sticky rubber flashing.


I got the shingles back on before the end of the day.  The shingles will be temporary; the stucco will go on after I have replaced all the windows on the front of the house (not before fall/winter).


Inside, the next day, I added insulation and drywall.


The new kitchen is the most complex project in the renovation.  Expect to see many more postings documenting work on the new kitchen before it's finally done.  Sigh.

Thursday, June 12, 2014

The New Kitchen - Part One

So the old kitchen was a disaster.  Even so, my original intent was to gut it and remodel in the same place, but with time (and a little thinking outside the box), a new plan emerged (albeit one that was going to take a lot longer to implement).

This is the initial floor plan, showing a bedroom abutting the living room.  Someone had already removed the closet from the room (there were telltale signs that one had been there); it may have been used as a study or den.  My initial plan was to use the space as my office.


I had planned to open up the old kitchen to the living room (had I kept it in the same place); the bedroom was much better suited to opening the kitchen up (and was also bigger than the old kitchen, a bonus!).  The new floor plan looks like this, with the future kitchen layout sketched in.  There will be a (Corian solid-surface) counter running the full length of the kitchen on the left, all the way to the far wall—12.5 feet, and no overhead cabinets.  The refrigerator will live on the right side, behind a new stub wall, and next to that there will be a five-foot wide commercial-grade stainless steel counter for bread and pizza-making.  Then the wall oven in a full-height cabinet, and finally more pull-out storage with a cubby for the microwave oven.  A new tall window will fill the space in the center of the far wall.


Because I thought I would be promptly redoing the kitchen, I bought new kitchen appliances right after moving to the house, so they've been sitting around for almost a year reminding me I don't have a real kitchen.  Still need to buy the dishwasher and the stainless steel counter (but those are bookmarked).


With the plan in hand, it was time for demo, and building the new stub wall (where the old door had been).


I really wanted counters that were higher than standard (I'm over 6'2"), and deeper.  I guessed 40" high and 30" deep, but to see if those dimensions were optimal, I built a rough stand-in counter to try out long term.  It's also become home for my temporary kitchen (microwave and toaster oven).  I've really enjoyed those dimensions a lot.


I mentioned that I was not going to have any upper cabinets over the counter on the left side of the kitchen (there is plenty of pantry space just across the hall).  On the right side, there would be floor-to-ceiling cabinets, but I wanted to avoid access issues for storage at ceiling level, which meant built-in soffits.  Putting these in early meant I could postpone cutting through the concrete slab to lay the drain pipe from the sink (hooray!).  The soffit above the stainless steel counter holds two recessed lights for that work area.


I'm currently working on putting the new windows in; that will be the subject of Part Two of the new kitchen saga.

Tuesday, June 10, 2014

Master Bathroom - Part One

When I moved into my house, it had two bathrooms, and each of those had a two-sink vanity (but only one electrical receptacle), and a bathtub.  The old master bedroom has become my home theater, so the bedroom across the hall (on the front of the house) will become the new master bedroom, and the bathroom next to it will become the new master bathroom.  It had one small half-circle, non-opening window over the bathtub.  The toilet in this bathroom was okay, a 1.6-gallon flush model, although the first time I lifted the lid, I discovered the seat had become detached somehow and had gone missing.  (Another item on the list for Home Depot!)


The tub tile was, shall we say, scary, and the tub no better, so it had to go, along with that long two-sink vanity.  The toilet in the other bathroom was an antique 3-gallon flush model, and since that was the bathroom I would be using for awhile, I pulled the 1.6-gallon American Standard and moved it to the other bathroom, and took the antique to the dump.  Time for demolition!


I always loved houses with basements for easy access to the house's mechanical and electrical systems, and loads of unfinished space for projects.  Out here, in the land of eternal summer, I ended up with a house built on a concrete slab.  So all the drain pipes are buried under concrete.  All the things that would need drains would be needing them in a different location in my plans.  Not looking forward to that!


Master bathrooms are entered from master bedrooms, and not from main hallways, that's just the way it is.  So I knew the doorway to the hall was going away.  And I had need of that door elsewhere.  With the tub and toilet hauled away, and the door removed to its new location guarding my pottery studio, I found I had an empty space I wanted to fill, and new drywall was going up as part of my new kitchen work.  I couldn't close off the doorway entirely, because I didn't have my new doorway to the bedroom yet, and there was the matter of that entirely too long vanity that needed some way to get out.  Half a doorway would do just fine, thank you.


And my new bathroom stayed like this for a long time while I focused on other projects.  Procrastination, as I continued to think about getting that nine-foot-long mirror out of there, and blasting through the concrete looking for drain pipes.  I started taking out the tub in August 2013, worked a little in March 2014, a little more in April, before moving aggressively (?) on the project in May.  In the meantime, the old bathroom was home for my cats' litter boxes and new window storage.


I finally decided to install the new bigger window as a way of putting off the concrete bashing.  I figured I needed the extra light and fresh air before I could do that nasty work.  So out with the last of the drywall, insulation, nails and screws, and extraneous copper water supply lines and ABS drain pipes, etc.  Cut an opening in the outside wall, and a doorway to the bedroom (for the pocket door), and frame for the new Andersen slider—four feet wide and three feet high (rough opening).  I am going to put the new vanity unconventionally under the window (mirror on the side), and the four foot by five foot shower at the other end of the long bathroom (toward the inside of the house).


The window installation was straightforward.  I removed the ugly masonite shingles from the outside of the sheathing, then installed the window with sticky rubber membrane flashing to keep water out, and then replaced the shingles.  After I replace the rest of the windows on the front of the house, I will pull off all the shingles and apply stucco (which covers the sides and the back of the house—strange they thought those press-board shingles were apparently the prestige siding material).


With the new doorway cut into the bedroom, I could finally close off the opening to the hall.  Hooray!


Drywall around the new window on the inside—I need these little psychologically uplifting progress markers, little bits of finished house . . .


. . . before getting back to the subterranean explorations :  (

Friday, June 6, 2014

Old Kitchen Transformation - Phase Two (Walls & Ceiling)

I had contacted an electrician (recommended by a friend) to upgrade the electrical service from 100 amps to 200 amps, driven by my plans for an electric pottery kiln (a 50-amp circuit), my electric clothes dryer (a 30-amp circuit; they had been using gas), and my new all-electric kitchen (a 30-amp circuit for the wall oven, and a 40-amp circuit for the smooth-top cooktop, versus the old gas range that had been in the house).  I wanted to get the wiring sorted out before the electrician installed the new breaker box, and so pushed to get the room finished (most of the house wiring converged on the room because that was where the breaker panel was).  As it turned out, I had plenty of time, because the electrician apparently had other things to do.

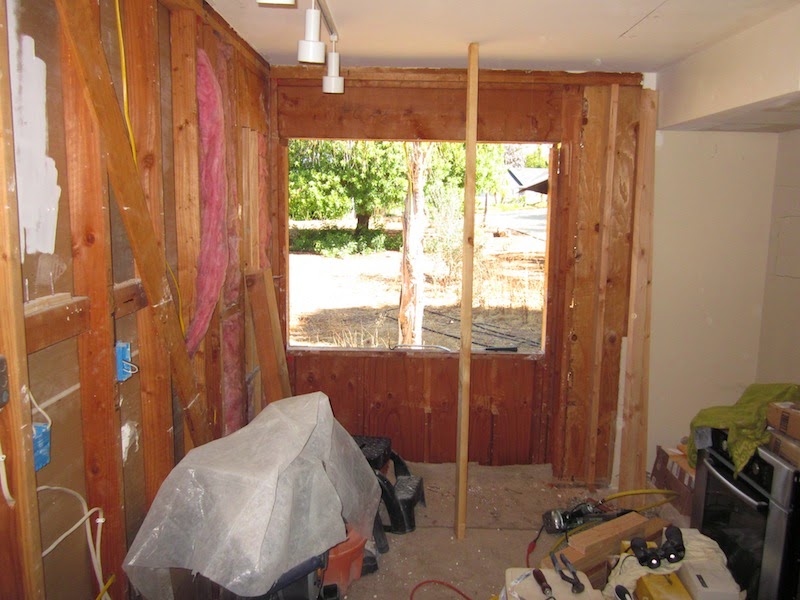
I started out building inner stud walls two inches thick to add insulation (and 3.5 inches thick where the electrical panel was, to allow plenty of room for routing the electrical cables).  Because I wanted better access to run the new kitchen wiring later (rather than struggling to get all those circuits into the main outdoor panel), I bought a 100-amp sub-panel from amazon and surface-mounted that on a piece of 3/4" plywood on a partition wall (see photo).  Doing this, I could bring the cables in from the side of the panel, rather than pulling them all in from the top, where there was much less room.  I then added another stud wall to the little wall holding the sub-panel, doubling its thickness, so that the sub-panel would be flush with the finished wall.  I continued to reroute cables (that had been in the old removed drop ceiling) through holes drilled in the top plate of the new inner wall that I had constructed in front of the main panel.


I continued to add my two-inch thick inner wall all around the room, and began work in the ceiling.  In the first photo. you can see two recessed cans (for recessed lighting):  the distant one is directly over where a kitchen-size sink will go, and the closer one is directly over where the pottery kiln will sit.  There is a framed opening between those two lights where an attic exhaust fan will be placed; the kiln puts out a lot of heat, and at least in the summer, all that heat must be sucked out, in this case into the attic, where it will be pulled out through a wind-driven roof ventilator.  To the left of the fan is a blue plastic mounting box for a general illumination ceiling light.


This next photo is on the left side of the room, a drop soffit for four recessed flood lights that will illuminate a work bench.  The photo after that shows the first sheet of drywall up at the far end of the room, and at the near end of the ceiling, an opening for permanent access to this end of the attic (the other hatch is at the far end of the house, and because the roof is framed with trusses, it's hard to move around up there).


Drywall went up without a problem, and finally I could see what the room really looked like.


The drywall wasn't quite up everywhere, as I was still waiting for the electrician, who needed access to the inside of the main breaker panel.  And I was still rerouting cables and running new circuits.


None of the windows in the house had been trimmed out with jams and molding; they were cheaply finished with drywall over the rough framing.  Not a big fan of that, so I will trim out my new windows, complete with sills (to put things on, and the cats like them).


I built three shelf units to go over the future work bench, and installed those.  They will be used for pottery glazes and who knows what else; you can't have too much horizontal storage.  The rough workbench holding my temporary kitchen was originally built to test kitchen countertop height (40"), and depth (30"), which dimensions I will be keeping in my new kitchen (and also the finished cabinet/countertop for the pottery studio).  Oh, and did I mention the yellow paint?  The rest of the house (except for the home theater) will be off-white, so the pottery studio gets the token dash of color!


With the new electrical panel finally installed, drywall work could be completed.  I ran circuits for the new kitchen (oven, cooktop, refrigerator, dishwasher, and two 20-amp receptacle circuits) before closing up the wall.  I also installed blue plastic conduit from the sub-panel cavity up to the attic so I wouldn't have to tear off the drywall for future circuits (just feed the wire through the conduit/tubes).  I have since run two other sub-panel circuits through the conduit: a 20-amp GFCI circuit for the new bathrooms—the existing 15-amp circuit was flaky, and a 15-amp circuit for new hall/living room lighting.


This final photo shows what it looks like from the outside, with the stucco patched up around the new windows and breaker panel, with an elastomeric stucco paint applied (new color), and with the trim scraped and power-washed and solid-stained a new color to match the outside window color (all the old trim was white).  The whole house needs the same treatment.


Thursday, June 5, 2014

Old Kitchen Transformation - Phase One (Deconstruction)

The existing kitchen was a mess, and the more I looked at it, the more it became clear that it needed a complete gut job and rebuilt from scratch.  I started to think about the design of the new kitchen, but as time passed and I considered what I was going to do with the rest of the house, I realized I would have to think outside of the box.


The old cabinets were constructed from thin particle board, falling apart, with no decent drawers.  The appliances were mostly non-functional.  Thick concrete countertops covered with tile and dirty grout.  Everything was covered with a layer of grease that the seller's painters didn't even try to remove.


The windows were the cheapest I had ever seen: flimsy aluminum frames with a single layer of glass.


The base of the cabinets contained evidence of a mouse infestation,
but no sign of them since—not with five cats!
The old kitchen and small adjacent dining room just were not going to work well for the new kitchen (I had no use for a dedicated dining room).  I also wanted a pottery studio and was thinking about where I could put that.  It soon became apparent that the old kitchen/dining area would be ideal for my pottery studio, and the bedroom adjacent to the living room would make a much better kitchen.  So with that . . .


The kitchen had a drop ceiling (Why would they do that?) that left my 6'3" height feeling claustrophobic.  In California they mandate outside electrical breaker panels, with the breakers sharing the box with the meter, supposedly so the fire department can shut off power from the outside (but so can burglars).  The fire departments in the rest of the country seem to manage just fine with indoor boxes (they can shut power off from the outside by pulling the meter, if they have to).  So the breaker boxes are so cramped that most houses need subpanels for circuits that can't be accommodated by the outdoor box.  It also means that in a regular 2x4 stud wall, no insulation behind the box.  


So down came the drop ceiling, exposing a mass of loose wires that had been routed through that space.  Many were wires for kitchen circuits which were no longer going to be needed (garbage disposal, dishwasher, etc.)


I also discovered the water supply lines, haphazardly routed, and TWO sets of them, one gray plastic polybutylene, and one copper.  Which was active?  I discovered the polybutylene pipes were empty (a material judged to be defective); the copper were active but run without insulation in the attic for the full length of the house.  At first I couldn't understand why the "cold" water was scalding hot, until I went up in the attic where it was about 140˚ (no venting).  I ripped out all the old polybutylene and started on the copper, as I intended to replace all with PEX tubing, insulated, routed inside the house proper. 


The intense Southern California afternoon sun coming through the west-facing window did a great job of heating the room, so I deleted it, and also started to add a couple of inches of thickness to the wall for more insulation.


The sides and rear of the house were covered with stucco, but no sheathing underneath (just roofing paper over wires stretched across the studs.  I was shocked!  Went to old This Old House episodes and youtube for lessons on applying stucco. 


The little greenhouse window in the corner had to go; it worked as well as an oven to heat the room.  In fact, all the windows in the house had to go.  I ordered efficient Series 100 Andersen Windows (their value line, but very nice quality).


New window installed on the left; old one removed on the right.  In this case, the new
windows are the same size as the old ones, but installed 6" higher (because the drop ceiling was removed,
and my new countertops will be higher).  
So deconstruction came to a close, and the transformation of the old kitchen had started.  This first phase lasted late-July through November, 2013 (with other projects running concurrently).  Phase Two next time.