Well, just have to remove the 2x6 forms from the side of the driveway slab, and take the plastic sheet off after a couple more days (don't want the concrete to dry out before its initial cure).
At the end of the last post, I had removed the forms from the foundation (stem) wall, leaving trenches on both sides of the wall, and big piles of hard chunks of dirt and granular soil. The trenches needed to be filled in, and the piles of earth needed to be removed, to make the ground flat and level (more or less), roughly 4.5" to 5.5" below where the surface of the new slabs would be.

Unfortunately, the big chunks of hard soil were mixed in the piles of more granular soil, that could be shoveled into the trenches. It took a few days of separating out the chunks using a pitchfork, three-tined cultivator, and rake, and hauling them to piles in the back yard. The granular soil was then added to the low areas (and compacted), and dug out from the high areas. I also bought ten bags of sand to help with the leveling. Once that was under control, I started making the new forms, beginning with the simple form at the side of the new driveway where it met the yard.

That was the easy part. The more challenging form was that separating the level garage slab from the sloping driveway slab, the latter being a half-inch lower at the interface. I decided that a strong but thin piece of wood solidly attached to the concrete wall was needed. I ended up using a 3/4" thick piece of hard maple with a dado routed in the top edge to separate the two levels of concrete. I fastened it to the concrete wall with special concrete bolts (screwed into holes drilled in the concrete), supplemented by construction adhesive.

The maple will eventually rot, creating an expansion joint that can be filled with sand. Seemed like a waste of a good piece of maple, but the wood store had a big stack of it and it was on sale. (bought another piece for my kitchen countertop)
I also glued pieces of expansion joint to the front of the foundation wall that would be used as a guide to level the top of the concrete driveway. Here's what it looked like with a bit more leveling to do. I used a long straightedge to measure how big the gap was above the soil, adding or subtracting until arriving at a slab thickness of 4.5 to 5.5".

Then I placed the rebar and steel mesh — a lot in the the new extended garage slab, and little to none in the driveway slab (the rest of the existing driveway had no steel reinforcement). I drilled into the existing garage slab and epoxied four pieces of rebar into those holes, tying the new and old garage slabs together).

And then I took a breath, and waited. Saturday morning arrived to lightly organized chaos. No time for photos. The concrete truck arrived 30 minutes early, and my neighbor the concrete maestro had gone off on some errand, but he also showed up as I confided my anxiety to the personable truck driver, who conveyed the idea that all would be just fine. But my neighbor's son-in-law assistant was still missing. We forged ahead, I jumping from one task to the next — five things going on at once, concrete flowing out of that long chute, being shoveled and vibrated and shoved into place.
The assistant arrived and I focused on my task at hand, and then the next. After awhile, enough concrete had been dispensed, and the truck driver set about cleaning the concrete out of the chute. I guided where that could go, and then my prime responsibility — that would be writing checks.
The truck left and we continued to work. The assistant left and I became the new prime assistant. 9:30 a.m. to 3:30 p.m. Six hours and the job was done. No break for lunch. Concrete waits for no man.
Looked like this:
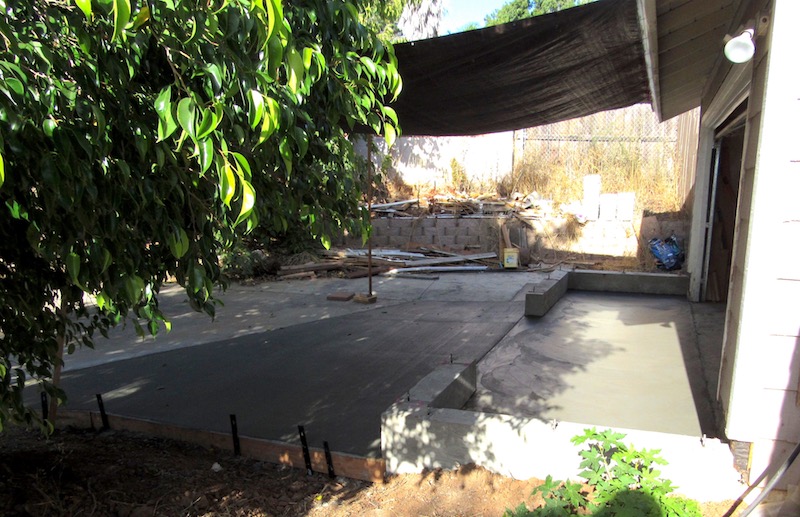
And this:

The concrete maestro does beautiful work. I was amazed there had been no disaster. I took another breath, ate a late lunch, and misted the concrete with water and covered it all with plastic to keep the moisture in until the concrete was cured.
Done.
Next project: finish the kitchen countertop. Then cover the newly poured front porch concrete with quartzite tile. Then pottery studio cabinets. Then drawers . . . Sigh.
No comments:
Post a Comment