Every place I've ever lived has been designed for that "average American family," with lots of bedrooms, living room, dining room, family room, etc. The problem was that I was a single person, not an average family. I needed space, but for hobbies, not people. And because I'm over 6'2", bending over to use sinks designed for children was a constant frustration. Over the years, I collected a list of things I would change if I could have my dream house. As I approached retirement, I realized time was running out for that house; it was now or never.
Dreams are not always perfect, however. I could never afford my dream house, a spacious Southern California home overlooking the Pacific Ocean. But I could afford a modest ranch house, with a 20-mile drive to the beach. It was a very long way from perfect, but it had potential.
This blog documents the process of turning that small average house into something that matches my lifestyle. It will be as close to my dream house as I can make it. I'm doing all the work myself to stretch my resources. By not hiring contractors, I can afford high quality materials, and I'll know the job is always done right. The remodeling will be my primary avocation for a few years, even as I try to fit in my writing and other hobbies.
It promises to be an interesting journey, and a challenging one!
Friday, August 17, 2018
Porch Roof — Part 2
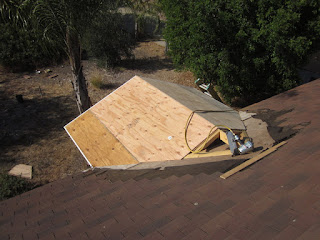
To get the plywood for the roof deck up on the roof, since I work by myself, I leaned my extension ladder against the edge of the roof and pushed the 0.6" plywood up. It worked well; I will use the same technique to get the bundles of shingles up on the roof (except maybe I'll pull those up the ladder with a rope).
Here are the two sheets of new plywood I used, nailed in place; the rest was recycled from my old concrete forms. The final small triangles of plywood would soon be in place.
The fascia on the front of the porch looked too bare and wide, so I added pieces of my usual PVC baseboard to the top, upside down, to give it some interest. The before:
And the after:
With the rest of the ceiling installed, I started adding the soffit. More T1-11.
With the soffit finished, I just need to add some trim strips to hide some edge gaps, and some other decorative trim around the base and top of the posts. But I'm going to do that later. What I really wanted to see was what it would look like with some color. The remaining house trim paint I had didn't go very far, but it did make the visualization easier.
Here's a closer wide-angle view. Almost done.
Now I need to start on the shingles. Still hot here, so planning to take my time . . .


No comments:
Post a Comment