Work is moving along at a deliberate pace, that is to say, not terribly fast. This is because the puppies are still, well, puppies, and so high maintenance. They're each eating five cups of food a day, and drinking a prodigious amount water — and growing like weeds, all of which means they need to be taken out to pee and poop at frequent intervals. Overnight excursions are now down to two, from three or four. I'm looking forward to them getting big enough to last the whole night without a potty break.

But I digress.
The old part of the garage was outfitted with the last remaining single-glazed, aluminum-framed window (a slider) in the house. The best that could be said for it was that it let in light, but also heat, cold, and noise, and oh, by the way, it wouldn't open. So it had to go.
In its place I installed two new smaller fixed windows (in addition to an identical window that went in the new section of the same side wall). The first of these two new windows I put in a solid part of the wall. That involved reframing on the inside, and cutting out a big rectangle of stucco on the outside. The header still to be installed.

I cut out the stucco using a circular saw fitted with a diamond masonry blade:

The integral window flange was then fastened to the framing.

Further along down the wall was the old window. The stucco had to be cut out around the periphery to remove the window, which surprisingly was only attached with about four nails (plus the stucco). (I've stapled sheet plastic in this photo to keep the breeze out.)
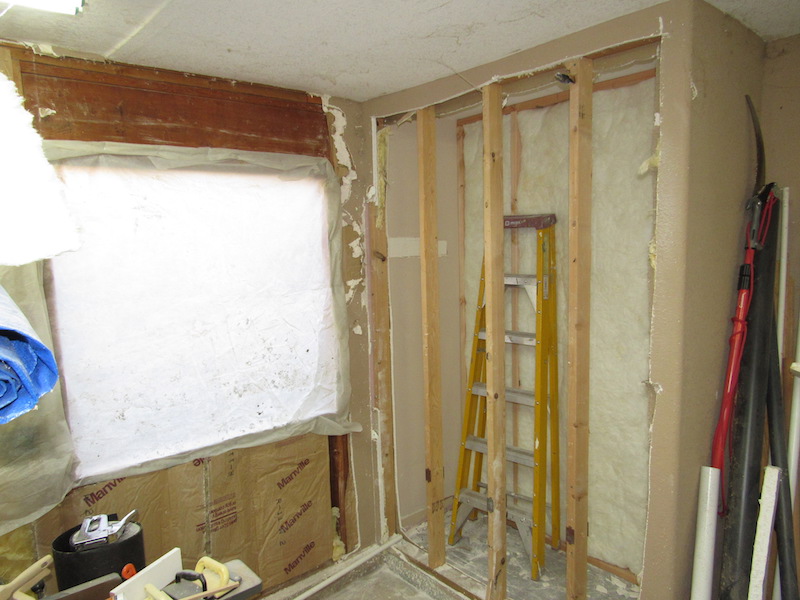
Also in this photo you can see the work started to recover the space taken from the garage for a closet for the back bedroom (my new stringed instrument workshop, not needing a closet). For that, I framed off the closet opening, and in this photo, have removed the drywall and insulation from the old closet back wall (old studs still remain at this point).
The old window had a substantial header over it, which I left in place; removing would have been a lot of work, without any advantage. So I reframed for the smaller window within the larger opening.
In this photo, the studs for the old closet back wall have been removed, except where connected to the ceiling and floor.

From the outside, this shows the old window cut out, and new framing (plywood was then fastened over the part of the opening around the new window):

And here's the new window installed:

Black building paper and a couple layers of wire mesh went on, followed by new stucco.

What it looks like on the inside, ready for insulation (recycled wherever possible).

And here it is, ready for new drywall:

Before the insulation went in, rough electrical for new receptacles and recessed lights was installed. A Home Depot delivery is on the way with ten sheets of drywall (plus more plywood for new garage cabinets, a pallet of retaining wall blocks, and 720 pavers for a new front walk). Next post should therefore be on drywall and paint. Window trim after that, and on and on. Sigh.
No comments:
Post a Comment