
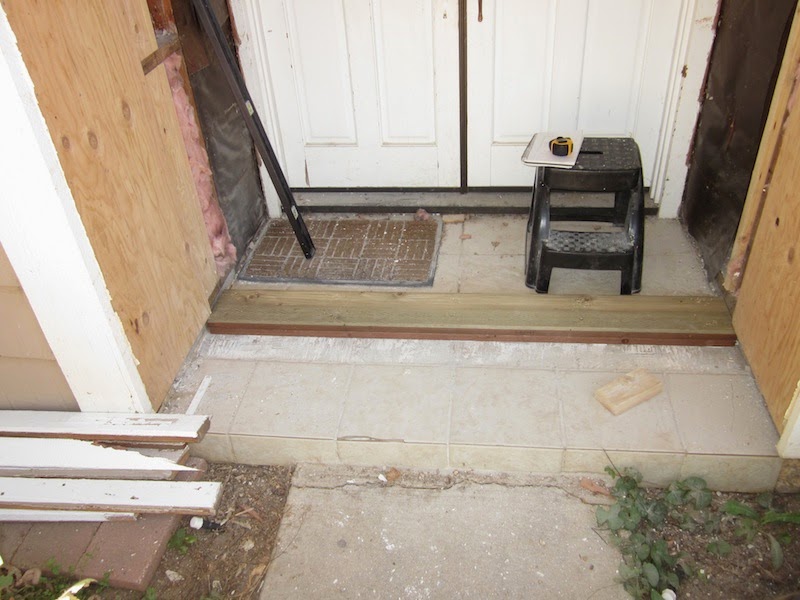
As long as I had to reframe the door wall, I thought it would be good to move it forward, using some of the alcove space to make a bigger foyer inside. I settled on a 2.5' move. That also meant that I could leave the existing door in place while I built the new wall, which had security benefits (and kept the cats from escaping). The window on the left side of the alcove had to be removed in any case because it would not work with the new kitchen. To anchor the new door wall, a new threshold had to be added to the concrete alcove floor (after removing the tile). The concrete outside was of course lower than the inside floor, and sloped to drain water. The threshold needed to be 2.25" thick and beveled 1 degree to match the inside floor. New framing was also added to both side walls, and covered with plywood.

I then designed the structure for the wall, offsetting the door to one side. When people go through a door, they don't walk straight through the middle of the doorway, but rather they go in or out through the side that opens (it's therefore very awkward if there is a wall immediately on that side). That gave me some space on the side of the door that opened, which I decided to use for a window. Because there was already glass in the door for me to look out, I positioned the new smaller window low so that my future dogs will be able to see who's coming to the door (dogs are always interested in visitors). Framing was straightforward, and included a substantial header over the door.

Plywood went on over the framing, flashing on before the fixed window went in, and then the door frame was installed plumb and level.

I bought the new door long ago in upstate New York at an outlet run by a window and door manufacturer to get rid of their returned, damaged, and otherwise unwanted product. My door had been a display unit, and as I now discovered, was probably a display unit because the frame was not square and the hinges were not aligned properly. So the door and frame needed some adjustments and paint before I could put them in place.

When I moved the door wall out, I had to remove the doorbell button and the "traditional" porch light. I therefore had to reroute the wiring for these, and install a new electrical ceiling box for the modern LED porch light.

The front of the house was covered with masonite simulated shingles that came in six-foot long panels. These will be giving way to stucco (which already covers the sides and back of the house). I'll apply the stucco on the front when I get all the new windows in. For now, however, just the front door wall is getting the treatment: two layers of black construction paper, then stucco wire fastened with furring nails and staples, and metal stucco channels along the bottom of the wall (for potential drainage if water gets behind the stucco) and around the door frame (I ordered the windows with integral stucco channels).

The stucco itself goes in in three layers: a scratch coat (3/8"), a brown coat (3/8"), and a final color/top coat (1/8"). Since I am applying an "elastomeric" stucco paint over all the stucco, I only use the top coat where needed to level everything.

Here is the final product at dusk, with the ceiling porch light on. The stucco is unfinished on the sides so it can be blended with the rest of the stucco when that goes up. Back in a few days to show you what the process looked like from the inside.

Wow! I like the fact that you were able to show us the door project in the various stages. I enjoy the idea of being able to change things in my home to fit my needs. It was smart that you shopped for the new door at an outlet. I am sure it was more budget friendly than going to a regular store.
ReplyDeleteEarl Mark @ Eastway Lock