I've been working on three windows in the back of the house. The living room window has been in for some time, and finished off on the inside, but I've just repaired the stucco on the outside. You can see it at the left edge of the photo.

Near the center of the photo above, high up on the wall, is the rear window for the guest bathroom. There has been a sliding window in that location, above the bathtub; I had to inconveniently climb up on the tub to open or close it. I bought a new fixed window to go there, with privacy glass; I'm recycling the old window for the laundry room. In the photo below, I've cut through the stucco around the old window with a diamond-bladed circular saw, then blasted out the stucco with my electric demolition hammer. I had to add spacers to each side of the opening because the new window is not a wide as the old one.

Amazingly, there is no plywood/sheathing under the stucco in this house. They just strung wires tightly across the studs, and stapled roofing felt over the wires, then wire mesh (like heavy chicken wire), and then applied the stucco. So from the inside the stucco is not flat (lots of bulges), which was a nuisance when reframing the wall for the new laundry room window (I had to cut down the new studs to fit over the high spots). Making big holes in a concrete house is also a pain. Cutting a new opening for a window in a wood house would have been much easier. With stucco, it's diamond blade cutting and the demolition hammer again. Demo in progress:

Putting the old recycled bathroom window in the opening was straightforward after removing the big stucco slab (deftly deflecting it as it fell, happily avoiding serious injury). The window from the inside (no trim yet):

Then for all three windows, the exposed perimeter was filled with roofing felt, wire mesh, and two coats of stucco (scratch coat and brown coat). Normally, a top/color coat goes on over that, but since I am coating the whole house with an "elastomeric" stucco paint, I will add the top coat stucco mix only where needed for touch-up and mild texturing.
The following two photos are of the living room window before and after stucco patching. The stucco needs to cure for a month before I can apply the paint.


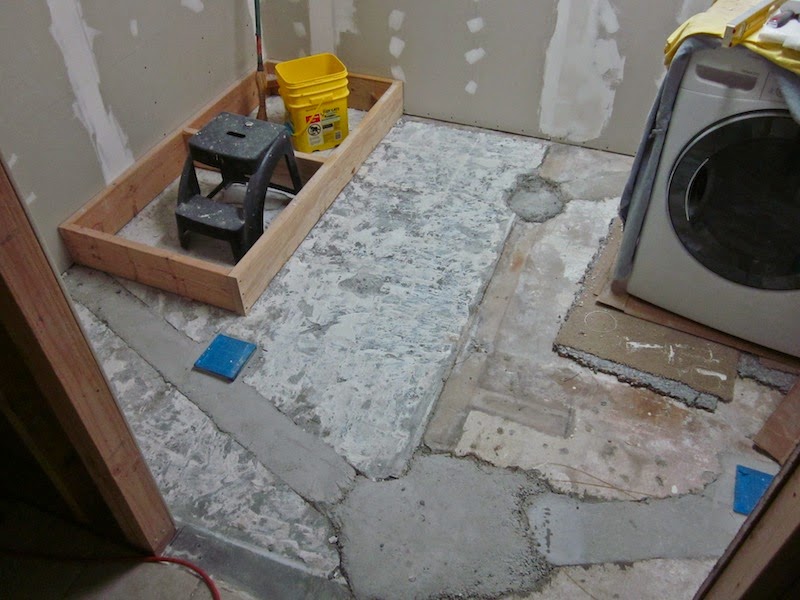
I plugged the clothes dryer vent hole in the laundry room, both inside with new drywall and outside with new stucco (I'm moving the dryer). I'm putting the front-loading washer and dryer on a 24" high platform, and just installed the base for that platform. I had to finally get around to blasting the old tile and mortar off the floor to do that, a prerequisite for pouring floor leveler over the left (garage) side of the floor to bring it up half-an-inch to match the right half of the floor.
Unfortunately, after the tile and mortar were removed, I discovered that the left side was lower only at the front of the room. At the back of the room, it was higher!
I'm still trying to get my head around that one, and figure out how to fix that (short of renting a big water-lubricated concrete-grinding machine). Sigh.
I may just kick that can down the road. My laundry basket is overflowing and I need to get the clothes dryer back in operation, i.e. cutting a new hole in the wall in its eventual location. I haven't decided whether to temporarily put the dryer up on the platform base (on a piece of plywood), or to move quickly to build the final cabinet/platform.
Or something else. Stay tuned . . .
Window replacement represents one of the more substantial investments you can make in your home. The replacement of old or under-performing windows can effectively reduce your monthly utility costs and give your home a bit more curb appeal.
ReplyDeleteUniversal Windows Las Vegas
Sliding Windows