Switching over to the new water supply system was one of those major milestone, perhaps even the major milestone of the house remodel. With the kitchen moved to another room, both bathrooms gutted and reconfigured, with a new laundry room, a new water softener, and a new high-efficiency water heater located in the laundry room, the old uninsulated and poorly-executed copper pipe system needed to be replaced. I've been doing that piecemeal for years, using modern PEX water lines.
The water softener was recently installed, and the remaining PEX lines added in the attic during a cool weather period. The water heater still needed a new gas line run, and PVC drain piping installed.
First, the gas line. My original plan was to have the new gas line done perhaps a week before I was ready to switch over to the new water system, with the gas line to the old water heater left intact (so I could have hot water during the interim). I decided to hijack the gas line that was feeding the furnace for the new water heater. The old steel pipe junction looked like this, with the old water heater branch running off to the right.

So I would remove the pipe coming in from the bottom of the photo and screw in the 1/2" black steel pipe for the new water heater. I bought pipe at Home Depot (they cut it to length and threaded the ends). By the time I was ready to install (cool morning), I had decided to switch over to the new water system the next day, so would just cut and cap the line going to the old water heater. That would leave the "tee" in place, when a reducing elbow would have been cleaner (but would have required a special trip to buy that fitting).
Unfortunately, there was a nipple (short length of pipe) between the "tee" and the reducing connector that would not come off, so I had to use the next "tee" to the left, which ended up looking like this:
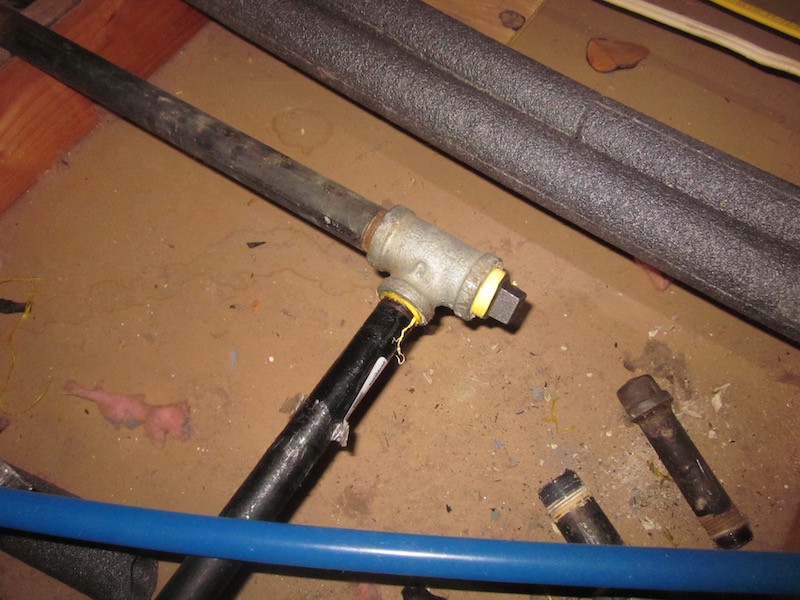
That change meant the pipe dropping down into the laundry room would be six inches over from the planned position, but I thought that would work, until I discovered the expansion tank on the wall was in the way, so I had to make that extra trip to Home Depot anyway to buy a six inch extension and a coupler. Minor difficulties, to be sure.
So this is what the water heater hook up (gas and PVC drain lines for condensate and pan) looked like (black gas pipe is at left with shutoff valve, sediment trap, and yellow flexible connector):

With that done, I was ready for water day! The next morning I shut off the main water valve, opened faucets to drain the old copper pipes, and drained the old water heater. Then I switched over the temporary PEX lines from the old copper system to the new PEX system for the washing machine, toilet, and pottery studio sink. That done, it was time to switch over the output of the main pressure reducing valve where the water came into the house. I had prepared an adapter to the pressure reducer to go from 1" copper to 1" PEX, and knew there could be an incompatibility with the union on the pressure reduction valve. And there was. Plan "B" was to re-use both halves of the old union and use a Shark-Bite press-on fitting to tie into the PEX.
That meant a trip to Home Depot for that fitting, and I also needed a new rubber washer for the old union. Home Depot did not have the washer, but 20 minutes in an old-fashioned hardware store produced one. I had hoped for a straight-line transition, but this worked (if not optimally):

I opened the main shutoff valve part-way and hoped for the best. I checked for leaks, and found none, but then heard water flow and discovered that I had left the shut-off valve for the missing guest room toilet open. Closed that and sopped up the water.
I had left the water softener bypass valve open, so that the water softener was out of the loop, but the water pressure gauges in the lines were operational, and their readings were troubling — 100 psi — which is what the outside pressure is. It meant the pressure reducing valve was not working. It had been working a few months before, or seemed to be — 68 psi. I adjusted the pressure downward, and the pressure dropped, but it gradually rose again to 100. That meant there was an internal leak in the valve, and it would have to be replaced.
I checked the water heater specs, and it would tolerate up to 150 psi, so I opened the shutoff valve to the water heater and let it fill. Unfortunately, water was soon gushing out of the top of the water heater, around the cold and hot water pipes leading into the tank. My expensive and complex high-efficiency water heater was defective!
A bit of backstory: I had noticed maybe a year ago that the pressure relief valve on the side of the water heater was angled to the side, and not pointing straight down as it should have been. Not a critical thing; it just meant I would have to be creative when I installed the discharge pipe, leading down to the drain pan. It looked like this:

Apparently the assembler at the factory had wanted to make the valve point straight down, but was unable to do so, but not for lack of trying very hard. Because I discovered that someone had used a very big wrench to try to turn the valve that didn't want to turn any further. When I tried to thread in an adapter to install the discharge pipe, it would not go in. So I looked from below and saw that the the fitting had been flattened on one side from the too-forceful application of the wrench.

That force also apparently did some damage where the pressure relief valve entered the tank, and hence the leakage. So no hot water. I have been collecting materials to take to Home Depot to see what the warranty claim process entails, but not fun, and a lot of work to remove the old water heater and install a new one. A lot of time as well — without hot water :-(
I have ordered a new pressure reducing valve; let's hope that installation goes well. And until the water pressure is under control, I have not brought the water softener into the loop (it is less tolerant of high pressure). Hopefully there will be no unpleasant surprises when I bring the water softener on-line.
In the meantime, today I assuaged my disappointment with some demolition. To wit, removing the old water heater and its platform from the corner of the garage:

And gutting the tub half of the guest bathroom, including cutting the steel tub in half to facilitate its removal out of the house. (both halves gone now)

Hopefully next time I will have good news about Rheem giving me a new water heater . . .
No comments:
Post a Comment