The first step in building the TV console was designing it. The bottom of the TV is about 22" off the floor, which is one constraint. The center-channel speaker had to be placed just below the center of the TV, and because of its size, there was no space below it for either the blu-ray player or the receiver. I wanted those two components to be as high as possible for easy accessibility, but did not want them to sit on top of a shelf — they should be inside the console, for aesthetic reasons. Those two criteria conflicted, so a compromise was needed.
Because everything has a remote control, the need to have those components up high was lessened. I still had to put discs into the player, and likely put memory sticks into the receiver. So put them just below a top shelf that was close to the bottom of the TV. Receivers get hot, and that heat must be vented, so there had to be free space above the receiver. The blu-ray player doesn't generate a lot of heat, so cooling for that was not critical, but clearly there would not be enough vertical space to put both receiver and player on top of each other. Which led to the decision to put those components on either side of the center channel speaker. That left room for drawers below.
So measure the components and draw the design and cut out the 3/4" plywood for the carcass. Tongue and groove joints, glue, screws, and biscuits for alignment and strength.

I used solid cherry for the trim to cover the plywood edges, and painted the exterior panels a dark blue (same as the credenza), and black for the interior.

At this stage, I moved the console from the garage to the living room, where I assembled and attached the two bases and applied a clear satin polyurethane to the cherry.

You can see there are three bays. The bay for the center channel speaker will have no top. The tops for the blu-ray player and receiver were designed to be far enough above those components for adequate cooling, so they could be solid, but I decided to use grates for the tops to permit the hot air to easily flow up. I decided on half-inch thick cherry slats standing on edge (1" high), and separated by 3/4". I milled pieces of cherry to carry those slats, with shallow 1/2" slots cut to hold the slats in place while gluing. The slots would also ensure even spacing. Forgot to take photos. 😕
I covered the ends of the slats with thin cherry strips (glued on).
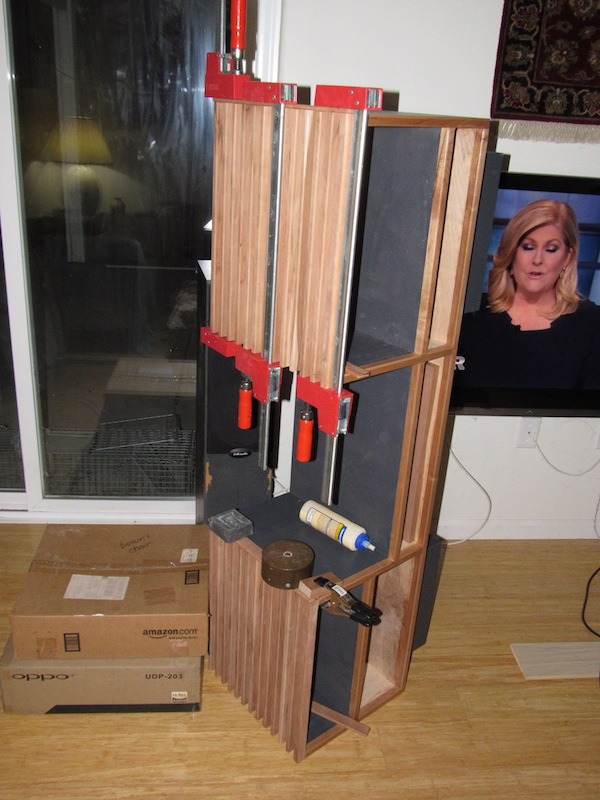
So this is what it looks like:

Another view below. While you apparently see three drawers along the bottom of the piece, these are just the fronts of future drawers. Like the last drawer in the credenza, these are dovetail drawers waiting to be built, along with a few more for the pottery studio, kitchen, and master bathroom. Half of these (including the three TV console drawers) will use half-blind dovetail joints, and for all of these I need to set up my dovetail jig and build a bunch of them (for efficiency).

Up Next
Last time I said I was starting on half of the guest bathroom. Well, I'm still going to do that, but I'm also adding in the other half as well — to wit, the deep soaking bathtub. Which means I'll also be doing the tile floor and the tile walls, the drain plumbing for the bathtub, and the plumbing for the tub fill and shower valve, etc., in addition to the vanity sink and its plumbing. I have pretty much decided on an American Standard reinforced acrylic tub that I can order from Home Depot, but have yet to find a source for the sink. This project will likely carry through the whole winter. Sigh.
On a very sad note, my young Australian Shepherd has died. He was just 2 and a half years old. He had epilepsy, and had been having seizures for the last year, which typically lasted about a minute, followed by a complete recovery within another few minutes. But last week a persistent electrical storm ravaged his brain, from which he could not survive. I sorely miss him.

No comments:
Post a Comment